We’ve all stared at blank walls wondering how to transform them into something meaningful and beautiful. Photo walls offer the perfect solution – they’re personal conversation starters and stunning focal points that showcase our most treasured memories.
Creating an impressive photo wall doesn’t require professional design skills or a massive budget. With the right approach you can turn any empty space into a captivating gallery that reflects your unique style and personality. Whether you’re working with family portraits vacation snapshots or artistic prints the possibilities are endless.
From gallery walls with matching frames to creative collages and mixed-media displays we’ll explore dozens of inspiring photo wall ideas that’ll breathe new life into your home. You’ll discover practical tips for planning layouts choosing the right frames and creating visual balance that makes your photos shine.
Gallery Wall Ideas for Creating a Stunning Photo Display
Gallery walls offer endless possibilities for showcasing your favorite memories while creating a ever-changing focal point in any room. We’ll explore three essential strategies that transform ordinary photo collections into eye-catching displays.
Mix Different Frame Sizes and Styles
Combining various frame dimensions creates visual interest and prevents your gallery wall from looking monotonous. We recommend using a mix of 8×10, 5×7, and 4×6 frames alongside larger statement pieces like 11×14 or 16×20 prints. This approach adds depth and draws the eye naturally across your display.
Incorporating different frame styles elevates the overall aesthetic of your photo wall. Try pairing sleek modern frames with vintage ornate pieces, or combine wooden frames with metallic accents. The contrast between materials like brushed gold, matte black, and natural wood creates a curated look that feels intentional rather than random.
Varying frame thicknesses adds another layer of dimension to your gallery arrangement. We suggest mixing thin profile frames with chunky statement pieces to create shadows and depth. This technique works particularly well when you want certain photos to stand out as focal points within your larger display.
Use a Cohesive Color Palette
Selecting a unified color scheme ties disparate elements together and creates harmony across your entire photo wall. We recommend choosing 2-3 main colors that appear throughout your frames, matting, and even within the photos themselves. Popular combinations include black and white with gold accents, or natural wood tones with cream and sage green.
Coordinating your photo subjects with your chosen palette enhances the overall cohesiveness of your display. Consider converting some images to black and white or applying subtle filters to ensure they complement your color scheme. This doesn’t mean every photo needs identical tones, but rather that they should feel like they belong together.
Using consistent matting colors helps unify frames of different styles and materials. We’ve found that white or cream matting works with virtually any frame combination, while black matting creates a more dramatic and sophisticated look. Stick to one mat color throughout your gallery wall for the most polished appearance.
Plan Your Layout Before Hanging
Creating paper templates of each frame prevents costly mistakes and saves time during installation. We always trace around each frame on kraft paper or newspaper, then cut out the shapes to arrange on the floor or tape temporarily to the wall. This method allows you to experiment with different configurations without putting holes in your wall.
Starting with your largest piece as an anchor point simplifies the arrangement process. Position your statement photo first, then build around it with smaller frames. We typically place the largest piece slightly off-center rather than in the exact middle, which creates a more ever-changing and visually appealing composition.
Maintaining consistent spacing between frames creates a professional, gallery-like appearance. We recommend keeping 2-3 inches between each frame for most arrangements. Use a ruler or cut a small piece of cardboard as a spacer to ensure uniform gaps throughout your display. This attention to detail makes the difference between a cluttered look and a curated gallery wall.
Travel Memory Photo Walls to Showcase Your Adventures

Transform your wanderlust memories into captivating photo wall displays that celebrate every destination you’ve explored. Creating travel themed photo walls allows us to relive our adventures while adding meaningful personality to our living spaces.
Create a Industry Map Photo Display
Industry map photo displays turn your travel photography into an interactive geographical journey. We recommend using a large industry map as your backdrop, then pinning photos directly onto the locations where they were captured. This approach creates an immediate visual connection between your memories and the places that inspired them.
Consider purchasing a vintage style map or printing a high quality custom version that matches your room’s color scheme. Push pins, small clips, or adhesive photo corners work perfectly for attaching pictures without damaging the map surface. Travel enthusiasts often find this method particularly satisfying because it showcases the scope of their adventures at a single peek.
Organize Photos by Destination
Destination based photo organization creates clean, structured displays that tell complete travel stories. We suggest grouping pictures from each country or city into separate sections using grid layouts or collage arrangements. This method works especially well when you have multiple photos from the same location.
Start by sorting your travel photos into destination piles, then select 3 to 5 of your best shots from each place. Arrange these groupings in chronological order of your trips or organize them by continent for a more geographical flow. Frame consistency within each destination group helps maintain visual cohesion while allowing variety across different locations.
Include Travel Memorabilia and Souvenirs
Travel memorabilia integration elevates photo walls from simple displays to comprehensive adventure showcases. We recommend incorporating ticket stubs, postcards, maps, currency, and small souvenirs alongside your photographs. Shadow boxes and deeper frames accommodate three dimensional items like seashells, pressed flowers, or miniature figurines.
Restaurant coasters, museum tickets, and boarding passes add authentic storytelling elements that photos alone cannot capture. Custom photo tiles offer flexibility for updating displays with new travel memories, making it easy to refresh your wall as adventures accumulate. Consider using clear protective sleeves for paper memorabilia to prevent fading and damage over time.
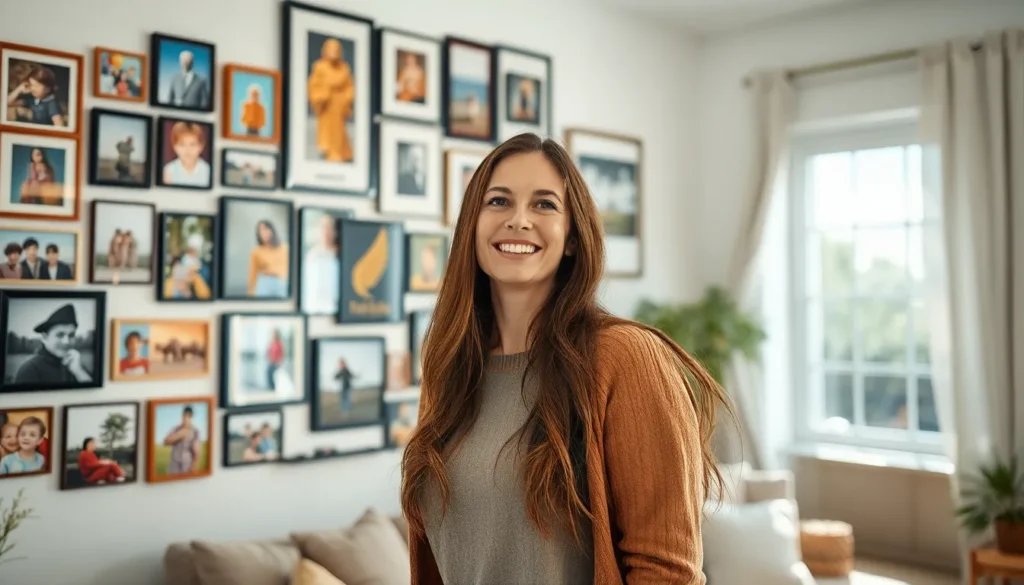
Family Photo Wall Ideas for Celebrating Loved Ones

Creating a meaningful family photo wall lets us showcase our most cherished relationships while honoring the generations that came before us. These displays become powerful visual stories that celebrate our family’s unique journey through time.
Design a Multi-Generational Family Tree Wall
Family tree layouts offer a beautiful way to organize photos chronologically while showcasing our lineage. Starting with the oldest generation at the base, we can arrange photos in branches that extend upward to represent newer generations.
Mix frame styles and sizes to reflect different eras and personalities throughout your family’s history. Vintage oval frames work wonderfully for great-grandparents’ portraits, while modern rectangular frames suit contemporary family photos.
Include names and dates using handwritten notes or small plaques beneath each photo. These details provide essential context and help younger family members learn about their heritage.
Use varying frame heights to create visual interest while maintaining the tree structure. Position larger ancestral photos as anchor pieces at the bottom, then layer smaller frames as you move up the generations.
Create Seasonal Family Photo Updates
Seasonal photo updates keep our family walls fresh and captivating throughout the year. We can easily swap out photos to reflect different holidays, vacations, or family milestones.
Use peel-and-stick displays like Mixtiles to make seasonal changes effortless. This method allows us to rearrange our gallery without damaging walls or frames.
Plan themed collections for each season, such as summer beach photos, fall harvest celebrations, or winter holiday gatherings. Rotating these displays creates anticipation and keeps family members engaged with the wall.
Coordinate with home décor by selecting photos that complement seasonal decorations. Spring flower photos pair beautifully with pastel accents, while cozy indoor shots enhance winter’s warm atmosphere.
Include Handwritten Notes and Quotes
Personal touches transform simple photo displays into deeply meaningful family treasures. Adding handwritten elements creates emotional depth that digital prints alone cannot achieve.
Write special memories on small cards placed next to corresponding photos. These notes might include funny quotes from grandparents, milestone achievements, or touching family moments.
Include inspirational quotes that reflect your family’s values or inside jokes that bring smiles to viewers’ faces. Handwritten text adds authenticity and warmth to any display.
Use decorative paper or vintage-style cards to complement your overall design aesthetic. Cream-colored cardstock works beautifully with both black-and-white and color photographs.
Mix fonts and handwriting styles from different family members to create a collaborative feel. Children’s artwork and elderly relatives’ cursive writing add unique character to the collection.
Artistic Photo Wall Arrangements for Creative Expression

Beyond traditional grid layouts, artistic arrangements transform ordinary photo displays into striking visual masterpieces. These creative approaches let us express our personal style while showcasing cherished memories in unexpected ways.
Try Geometric Patterns and Shapes
Geometric arrangements create bold focal points that instantly draw attention to our photo displays. We can mix frames of different shapes like triangles, squares, circles, and rectangles to form ever-changing patterns on our walls. This technique adds visual interest while breaking away from conventional rectangular grids.
Triangular compositions work particularly well for showcasing three related photos, such as vacation highlights or family portraits. Square frames create structured patterns when arranged in diamond formations or offset grids. Round frames soften harsh angles and add organic flow to geometric displays.
Different sized frames within the same shape family create depth and movement. We might start with larger hexagonal frames as anchor points, then fill surrounding space with smaller geometric shapes. This layered approach prevents the arrangement from appearing flat or monotonous.
Create an Ombre Color Gradient Effect
Ombre gradients transform photo walls into stunning color journeys that flow seamlessly across our space. We arrange photos in gradual color transitions, starting with darker tones at one end and progressing to lighter shades at the other. This technique works beautifully with both frame colors and photo content.
Frame-based ombre effects use mats or frames in different hues to create the gradient. We might transition from deep navy frames through medium blues to light sky tones, creating a sophisticated color story. Mat colors can also create this effect while keeping frame styles consistent.
Content-based gradients organize photos by their dominant colors. Sunset photos flow into golden hour shots, then progress to bright daylight images. This natural color progression creates visual rhythm while maintaining thematic coherence across our display.
Mix Photos with Art Prints and Illustrations
Combining personal photos with art prints creates ever-changing gallery walls that tell richer stories. We can integrate family portraits with complementary artwork, travel photos with vintage postcards, or milestone moments with inspirational quotes. This blend adds depth and personality to our displays.
Thematic connections work best when mixing different media types. Wedding photos pair beautifully with romantic poetry prints or botanical illustrations. Travel memories gain context when displayed alongside maps, cultural artwork, or typography featuring destination names.
Scale variation prevents mixed media walls from appearing cluttered. We balance detailed photographs with simpler graphic prints, ensuring each piece has breathing room. Color coordination ties diverse elements together, whether through complementary palettes or strategic accent colors that appear throughout the arrangement.
Bedroom Photo Wall Ideas for Personal Spaces

Personal bedrooms offer the perfect canvas for creating intimate photo displays that reflect our individual stories and cherished memories. We’ll explore three distinct approaches that transform bedroom walls into meaningful focal points.
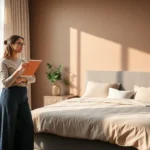
Design an Intimate Above-the-Bed Display
Above-the-bed displays create the ultimate focal point that greets us each morning and evening. We recommend mixing frame sizes and shapes to establish visual interest while ensuring the arrangement complements existing bedding and decor elements. Personal photos and family portraits work exceptionally well in this location since they evoke warmth and intimacy in our most private spaces.
Positioning photos directly above the headboard establishes a strong visual anchor that draws attention upward. We suggest creating arrangements that span roughly two-thirds of the bed’s width to maintain proper proportions. Family portraits, romantic couple photos, and meaningful milestone moments resonate particularly well in this intimate setting.
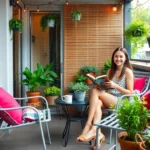
Create a Corner Gallery for Reading Nooks
Corner galleries transform unused bedroom spaces into cozy havens that encourage relaxation and reflection. We designate reading nook corners as perfect locations for curated photo collections that reflect our personal interests and favorite destinations. Travel photographs, hobby-related images, and inspirational quotes create captivating visual narratives in these quiet spaces.
Soft lighting enhances the reading experience while illuminating our carefully selected photo arrangements. We recommend incorporating adjustable lighting options that highlight the gallery during evening hours. Photos showcasing our passions, adventures, and aspirations work beautifully in reading corners since they inspire contemplation and personal reflection.
Use String Lights for Ambient Lighting
String lights add cozy ambiance while creating unique display opportunities for our bedroom photo collections. We combine warm string lighting with clothespins or clips to hang unframed photos, achieving a casual and inviting aesthetic. This approach creates nostalgic atmospheres that feel both relaxed and personally meaningful.
Warm LED string lights provide gentle illumination without overwhelming the bedroom’s peaceful environment. We position lights strategically to highlight our favorite photos while maintaining the room’s restful ambiance. Photos displayed with string lights work particularly well when we want to create seasonal displays or frequently rotate our featured memories.
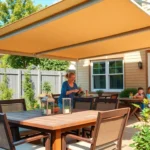
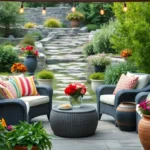
Living Room Photo Wall Ideas as Focal Points

Your living room offers the perfect canvas for creating stunning photo walls that capture attention and spark conversation. We’ll explore three powerful approaches to transform your space into a visual storytelling hub.
Design a Statement Wall Behind the Sofa
Create a gallery of family photos or artwork directly behind your sofa to establish an immediate focal point that draws the eye. Position colorful prints in matching frames to create an eye-catching display that complements your existing décor. White frames work exceptionally well for modern aesthetics, particularly when paired with black-and-white photography that adds timeless elegance to your space.
Arrange photos in varying heights and sizes to create visual movement while maintaining balance. Start with your largest piece as an anchor point, then build outward with smaller frames to create a cohesive composition. This approach transforms the wall behind your sofa into a ever-changing backdrop that reflects your personal style and memories.
Create Symmetrical Arrangements for Formal Spaces
Organize photos in neat grid patterns to achieve symmetrical displays that enhance formal living rooms and entryways. Consistent frame styles throughout your arrangement create a polished, sophisticated look that complements traditional décor. This structured approach works particularly well in spaces where you want to maintain visual order and elegance.
Measure equal spacing between each frame to ensure perfect alignment and professional presentation. Use a level and measuring tape to maintain consistent gaps, typically 2-3 inches between frames for optimal visual impact. Symmetrical arrangements create a sense of stability and formality that elevates the overall atmosphere of your living space.
Include Floating Shelves for Dimensional Display
Add floating shelves to your photo wall to display both photographs and decorative objects, creating depth and visual interest beyond flat wall arrangements. This combination adds dimension to your display while providing flexibility to showcase seasonal décor, plants, or meaningful collectibles alongside your cherished photos.
Layer different heights and textures by positioning smaller framed photos on shelves while hanging larger pieces on the wall behind them. This creates a multi-dimensional gallery that invites closer inspection and allows you to tell richer stories through your displays. Mix various frame sizes and shapes with art pieces to develop a unique, personalized look that reflects your individual style and experiences.
Creative Photo Wall Ideas Using Alternative Methods

Moving beyond traditional framing opens up exciting possibilities for showcasing your favorite memories. These flexible approaches let us create stunning displays without permanent wall damage.
Try Clothesline and Clip Displays
Clothesline displays offer incredible flexibility for constantly evolving photo collections. String a clothesline or wire across your wall and secure it with sturdy hooks on both ends. Mini clothespins or colorful binder clips become your hanging hardware, letting you attach photos directly to the line.
This method works perfectly in rented spaces where we need damage-free answers. Updates happen in seconds as you swap out photos for new favorites or seasonal collections. The collection grows naturally over time since adding more photos requires no additional planning or measuring.
Photography becomes interactive when guests can easily view each image up close. Multiple lines at different heights create layered displays that add visual depth to any room.
Use Washi Tape for Temporary Arrangements
Washi tape transforms photo displays into colorful, artistic arrangements without leaving sticky residue. Decorative tape comes in hundreds of patterns and colors, letting us create custom borders around each photo or connect images in creative ways.
Grid patterns work beautifully for uniform photo sizes, while abstract arrangements suit mixed collections perfectly. Freeform designs let creativity flow as we arrange photos in organic shapes or flowing lines across the wall.
Frequent changes become effortless since washi tape peels away cleanly from most wall surfaces. This approach suits bedrooms, offices, and children’s spaces where playful, colorful looks enhance the atmosphere. Seasonal updates take minutes rather than hours of rehanging framed pieces.
Create Photo Ledge Displays
Photo ledges provide sophisticated displays that combine the flexibility of shelving with the visual impact of wall arrangements. Install narrow shelves or floating ledges horizontally across your wall, then lean framed photos against the backing for an effortlessly curated look.
Mixing frame sizes becomes natural on ledges since different heights create appealing layered compositions. Various frame colors and finishes add visual interest while maintaining cohesive style throughout the display. Black and white photos mixed with color images create ever-changing contrast that draws the eye.
Stacked ledges work particularly well in living rooms, hallways, or above console tables where vertical space allows for multiple levels. Swapping photos requires no tools or measuring since we simply lean new pieces in place of old ones. This approach lets us layer depth into displays by overlapping smaller frames in front of larger ones.
Small Space Photo Wall Ideas for Compact Areas

Small spaces don’t have to limit our photo wall ambitions. We can transform even the tiniest areas into stunning displays with these strategic approaches.
Use Corner Spaces Effectively
Corner gallery walls turn underused spaces into ever-changing showcases that maximize every inch of our compact homes. We can arrange frames in corner configurations to draw the eye upward and create the illusion of larger rooms without overwhelming the space. This technique works exceptionally well in powder rooms, small entryways, and kitchen nooks where traditional wall space is limited.
Strategic corner placement allows us to create focal points in areas that typically go unnoticed. We position photos at varying heights along both walls that meet at the corner, creating visual flow that guides attention throughout the room. Corner displays also offer the advantage of being visible from multiple angles, giving our photos greater exposure in tight quarters.
Create Vertical Gallery Walls
Vertical arrangements emphasize height in narrow spaces and make rooms feel significantly taller than they actually are. We can hang photos in columns or staggered vertical lines along narrow walls between doors and windows, transforming these challenging spaces into striking displays. This approach works particularly well in stairwells, small hallways, and beside furniture like sofas or consoles.
Staggered vertical layouts add visual interest while maintaining the space saving benefits of narrow arrangements. We alternate photo sizes and positions slightly to create movement within the vertical format, preventing the display from appearing too rigid or monotonous. This technique draws the eye upward, creating the perception of higher ceilings in compact areas.
Use Multi-Photo Frames for Efficiency
Multi-photo frames consolidate multiple images into single units, saving precious wall space while maintaining cohesive displays. We can choose from duets, trios, and collage frames that accommodate various photo configurations to fit different layouts and room dimensions. These frames are especially practical for small apartments where every inch of wall space counts.
Collage frames offer the flexibility to showcase related memories within organized boundaries. We select frames with different opening sizes to create visual hierarchy while telling complete stories within compact displays. This approach eliminates the need for multiple hanging points and reduces visual clutter in small spaces.
| Frame Type | Space Efficiency | Best Use Case |
|---|---|---|
| Duo frames | High | Couples photos, before/after shots |
| Trio frames | Very high | Sequential moments, family portraits |
| Collage frames | Maximum | Travel memories, event collections |
DIY Photo Wall Ideas on a Budget

Budget constraints shouldn’t limit your ability to create stunning photo wall displays. We’ve gathered practical answers that transform ordinary household items into beautiful photo wall components.
Repurpose Everyday Items as Frames
Everyday objects in our homes can become unique photo frames with minimal effort. Old picture frames from thrift stores or unused calendars provide instant framing answers for our favorite memories. Book pages create vintage-inspired frames when we mount photos directly onto them or use them as decorative backgrounds.
Wooden hangers offer an unexpected mounting solution that adds rustic charm to any photo display. We simply clip our photos onto the hangers using mini clothespins and hang them from command hooks or existing wall fixtures. This method allows us to easily swap out photos while maintaining a cohesive look throughout our display.
Empty shadow boxes transform into multi-photo displays when we arrange several smaller prints inside them. Mason jars can hold rolled photos tied with twine for a farmhouse aesthetic. Even old CD cases work as contemporary frames when we remove the plastic inserts and slide our photos inside.
Create Your Own Mounting Systems
Fairy lights create magical photo displays that serve dual purposes as lighting and mounting systems. We clip our photos directly to the string lights using mini clothespins, creating a warm and inviting atmosphere in any room. Battery-operated fairy lights work perfectly for areas without nearby outlets.
Command strips and adhesive hooks protect our walls while providing secure mounting points for photo displays. These products work especially well for renters who can’t make permanent holes in walls. We can create grid patterns using command strips to hang multiple photos in perfectly aligned arrangements.
Twine or fishing line stretched between two points creates invisible photo hanging systems. We attach photos using small clips or clothespins, allowing them to appear as if they’re floating against the wall. This technique works particularly well for creating temporary displays that change with seasons or special events.
Use Printable Templates for Consistency
Printable templates eliminate guesswork when planning our photo wall layouts. We download free templates online that show various arrangement patterns, then print them to use as placement guides. These templates help us visualize spacing and proportion before committing to hanging our photos.
Graph paper becomes our best friend when planning symmetrical photo arrangements. We sketch out our desired layout on graph paper, using each square to represent exact measurements on our wall. This method ensures balanced spacing between frames and helps us calculate exactly how many photos we’ll need for our design.
Paper templates cut to match our photo sizes allow us to test arrangements directly on the wall. We tape these templates to the wall and move them around until we find the perfect layout. Once satisfied with the arrangement, we simply replace each template with the corresponding photo, ensuring precise placement every time.
Conclusion
We’ve shown you that creating stunning photo walls doesn’t require expensive materials or professional expertise. With the right approach and creativity you can transform any space into a meaningful display that tells your unique story.
Whether you’re working with a spacious living room or a cozy corner these ideas prove that every wall has potential. From gallery arrangements to travel displays and family timelines there’s a photo wall solution that fits your style and space.
Remember that the best photo walls evolve over time. Start with what you have experiment with different layouts and don’t be afraid to make changes as your collection grows. Your walls should reflect your journey and inspire you every day.
Frequently Asked Questions
What are photo walls and why should I create one?
Photo walls are decorative displays that transform blank wall spaces into meaningful showcases of cherished memories. They serve as personal conversation starters and help you relive special moments. Creating a photo wall doesn’t require professional design skills or a large budget, making it an accessible way to personalize your space and celebrate family, travel adventures, or artistic expression.
How do I plan the layout for my photo wall before hanging frames?
Start by using paper templates cut to match your frame sizes and arrange them on the floor or tape them to the wall. Begin with a large anchor piece as your focal point, then build around it. Maintain consistent spacing between frames (typically 2-3 inches) and consider the overall balance of colors, sizes, and visual weight before making any holes in the wall.
What are some creative alternatives to traditional framed photo walls?
Try clothesline and clip displays using wire and mini clothespins for easy photo swapping. Use colorful washi tape to create temporary geometric arrangements that can be changed frequently. Photo ledges allow you to lean pictures against narrow shelves for a sophisticated, easily rearrangeable display. These methods offer flexibility and don’t require permanent wall damage.
How can I create photo walls in small spaces?
Maximize corner spaces by arranging frames in corner configurations to create the illusion of larger rooms. Use vertical gallery walls with staggered layouts to emphasize height in narrow spaces. Multi-photo frames consolidate several images into single units, saving wall space while maintaining cohesive displays. These strategies help you showcase memories without overwhelming compact areas.
What are some budget-friendly DIY photo wall ideas?
Repurpose everyday items as unique frames, such as old picture frames, book pages, wooden hangers, or mason jars. Use fairy lights with clips and command strips for damage-free mounting systems. Create printable templates or use graph paper for planning layouts to ensure consistency. These practical approaches let you create stunning displays while staying within budget constraints.
How do I create a cohesive gallery wall with different frame sizes?
Mix various frame sizes and styles while maintaining a cohesive color palette to unify the display. Use paper templates to plan your arrangement before hanging. Start with your largest piece as an anchor, then arrange smaller frames around it. Keep consistent spacing between all frames and balance visual weight by distributing colors and sizes evenly across the wall.
What are the best photo wall ideas for bedrooms?
Create an above-the-bed display combining various frame sizes as a warm focal point. Design corner galleries in reading nooks with curated collections that inspire relaxation. Add string lights for ambiance and casual displays that can be easily updated. These approaches create intimate spaces that reflect your personal story while maintaining a peaceful bedroom atmosphere.
How can I incorporate travel memories into my photo wall?
Create an adventure map display by pinning photos to a map of locations you’ve visited, establishing visual connections between memories and places. Organize photos by destination to tell complete travel stories. Integrate memorabilia like ticket stubs, postcards, and maps to enhance the narrative and create a comprehensive travel showcase that brings your adventures to life.
What techniques work best for family photo walls?
Design multi-generational family tree walls organizing photos chronologically to represent lineage. Use varying frame styles and sizes to reflect different eras. Add seasonal updates with peel-and-stick displays for easy photo swaps. Include personal touches like handwritten notes and meaningful quotes to add emotional depth and create treasured family keepsakes that honor your history.
How do I create artistic photo wall arrangements?
Experiment with geometric patterns and shapes using various frame styles to create bold focal points. Try ombre color gradient effects where photos transition seamlessly through color spectrums. Mix personal photos with art prints and illustrations for richer, thematic displays. These innovative techniques enhance visual impact while reflecting your personal style and creative storytelling abilities.