
We’ve all been there – walking through a dimly lit hallway that feels more like a cave than part of our home. Hallway lighting fixtures aren’t just functional necessities; they’re the unsung heroes that transform boring transitional spaces into welcoming pathways that connect our living spaces seamlessly.
The right lighting can make narrow hallways appear wider, dark corridors feel inviting, and long passages seem shorter. Whether you’re dealing with a cramped apartment hallway or a grand foyer entrance, choosing the perfect fixtures involves balancing style, functionality, and your home’s overall aesthetic.
We’ll explore everything from sleek flush-mount ceiling lights to dramatic pendant fixtures that make a statement. You’ll discover how proper hallway lighting can enhance your home’s safety, boost its value, and create an atmosphere that welcomes both family and guests with warm, well-designed illumination.
Choose Pendant Lights for Statement-Making Hallway Illumination
Pendant lights transform ordinary hallways into dramatic focal points that showcase your personal style. We’ll explore how these suspended fixtures create visual interest while providing functional illumination for your transitional spaces.
Consider Scale and Proportion for Your Space
Measure your ceiling height before selecting pendant fixtures to ensure proper proportions. Hallways with 8-foot ceilings work best with smaller pendants measuring 6 to 12 inches in diameter, while spaces with 9-foot or higher ceilings can accommodate larger fixtures up to 18 inches wide.
Space multiple pendants 24 to 30 inches apart when installing a series along your hallway. This spacing prevents visual crowding while maintaining consistent light distribution throughout the corridor.
Account for walking clearance by hanging pendants at least 7 feet above the floor in standard hallways. Higher traffic areas or homes with tall family members may require 7.5 to 8 feet of clearance for comfortable passage.
Calculate the fixture width using the one-third rule: your pendant should measure approximately one-third the width of your hallway. A 6-foot wide corridor pairs perfectly with pendants measuring 18 to 24 inches in diameter.
Select Materials That Complement Your Decor Style
Match metal finishes to existing hardware like door handles, light switches, and outlet covers for a cohesive design approach. Popular hallway pendant finishes include brushed nickel, oil rubbed bronze, and matte black that coordinate with contemporary home fixtures.
Choose glass shades for traditional or transitional hallways where you want to maximize light output. Clear glass pendants work exceptionally well in narrow spaces, while frosted or seeded glass options provide softer illumination for wider corridors.
Incorporate natural materials like rattan, wood, or woven textures for bohemian or farmhouse style hallways. These organic pendant materials add warmth and visual interest to otherwise sterile transitional spaces.
Consider industrial elements such as exposed bulbs, metal cages, or concrete shades for modern or loft style homes. These raw materials create striking contrast against smooth drywall surfaces while maintaining the clean lines hallways require.
Select fabric drum shades for cozy, residential hallways where you want to soften harsh overhead lighting. Linen, cotton, and burlap pendant shades filter light beautifully while adding texture to minimal hallway decor.


Install Recessed Lighting for Clean, Modern Hallway Appeal

Recessed lights create a sleek, contemporary appearance by blending seamlessly into your ceiling. We’ll explore the essential aspects of recessed lighting installation to achieve professional results in your hallway.
Plan Proper Spacing Between Fixtures
Spacing recessed lights correctly ensures even illumination throughout your hallway without creating dark spots or bright patches. We recommend placing ceiling fixtures every 8 to 10 feet for optimal light distribution in most residential hallways.
Short hallways under 10 feet require just one centrally positioned fixture to provide adequate lighting. Medium hallways spanning 10 to 20 feet need at least two evenly spaced fixtures to eliminate shadows and maintain consistent brightness. Longer hallways benefit from multiple fixtures positioned at regular intervals to create smooth light transitions.
Consider your hallway’s width when determining fixture placement. Narrow corridors work well with a single row of recessed lights down the center. Wider hallways may benefit from two parallel rows of fixtures to provide broader coverage and reduce wall shadows.
Choose the Right Beam Angle for Even Coverage
Beam angle selection directly impacts how light spreads across your hallway surfaces and affects the overall ambiance. We use narrow beam angles around 15 to 30 degrees for accent lighting that highlights artwork or architectural features along hallway walls.
Medium beam angles between 40 to 60 degrees work best for general hallway illumination. These angles provide broader light distribution that covers more floor area while maintaining adequate brightness levels for safe navigation.
Wide beam angles of 80 degrees or more create the most comprehensive coverage for hallway lighting. We recommend these wider angles for hallways with high ceilings or when you need maximum light spread to eliminate dark corners and create an open feeling.
Flood beam angles prevent the creation of bright spots directly under fixtures while ensuring smooth light blending between adjacent recessed lights. This approach maintains even coverage throughout your hallway’s length without creating harsh lighting contrasts.

Add Wall Sconces for Elegant Ambient Lighting

Wall sconces create sophisticated ambient lighting that transforms ordinary hallways into elegant pathways. These fixtures offer a refined alternative to overhead lighting while providing gentle illumination that enhances your home’s architectural features.
Position at Eye Level for Optimal Light Distribution
Installing wall sconces at eye level ensures the most effective light distribution throughout your hallway space. We recommend mounting these fixtures between 5 to 6 feet from the floor to achieve optimal illumination patterns that prevent harsh shadows and create comfortable lighting zones.
Proper height placement allows the light to spread evenly across the hallway width while avoiding glare issues that can occur with poorly positioned fixtures. Spacing your wall sconces about 6 to 8 feet apart maintains consistent illumination throughout the corridor and prevents dark spots between fixtures.
Consider your ceiling height when determining the exact mounting position for each sconce. Higher ceilings may accommodate slightly elevated placement while standard 8-foot ceilings work best with the traditional 5 to 6-foot mounting height.
Match Finishes to Existing Hardware
Coordinating your wall sconce finishes with existing hardware creates a cohesive design aesthetic throughout your hallway space. We suggest selecting sconce finishes that complement door handles, light switch plates, and other metallic elements already present in your corridor.
Popular finish combinations include brushed nickel sconces paired with matching door hardware or oil-rubbed bronze fixtures that coordinate with dark cabinet pulls and hinges. Consistency in metal finishes prevents visual confusion and creates a polished, intentional appearance.
Mixed metal approaches can work effectively when done thoughtfully, such as combining warm brass sconces with cooler stainless steel elements in modern or transitional hallway designs. The key lies in maintaining balance and ensuring that metallic finishes complement rather than compete with each other throughout your hallway’s design scheme.


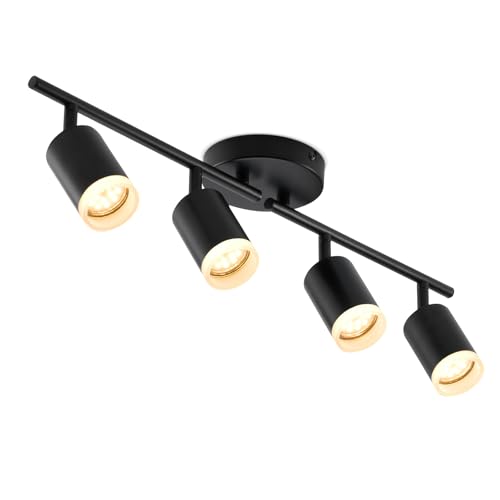
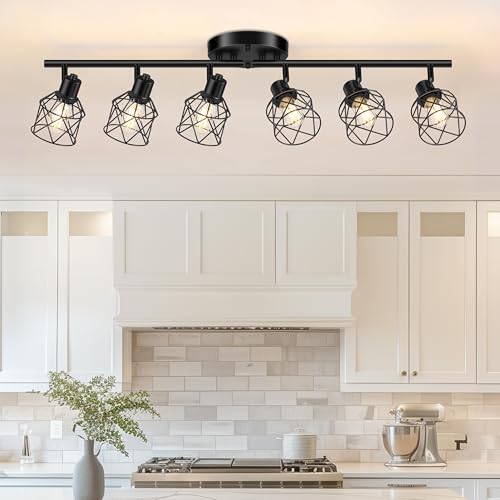
Incorporate Track Lighting for Flexible Directional Control

Track lighting systems offer unmatched versatility for hallway illumination by allowing each spotlight head to be individually positioned and aimed. This flexible approach provides targeted lighting control that adapts to your exact hallway needs and design preferences.
Adjust Individual Heads to Highlight Artwork
Directing each track head toward exact artwork creates professional gallery lighting effects in your hallway. Position spotlights to illuminate paintings, photographs, or sculptural pieces with focused beams that eliminate shadows and showcase the details of your displays.
Aim track heads at a 30-degree angle from the artwork to minimize glare and create even illumination across the surface. Space multiple heads along the track to ensure consistent lighting coverage when highlighting a series of pieces or a long gallery wall.
Focus individual spotlights on architectural features like decorative molding, textured walls, or built-in niches to add visual depth and interest. Adjust beam angles to create dramatic lighting effects that emphasize the unique character of your hallway’s design elements.
Use Dimmer Controls for Variable Lighting Needs
Installing dimmer controls with track lighting systems enables brightness adjustment for different occasions and times of day. Create welcoming ambiance for entertaining guests by lowering the light levels to approximately 30-50% of full brightness.
Increase illumination to maximum levels when performing cleaning tasks or searching for items in hallway storage areas. Dimmer functionality allows you to provide bright, functional lighting when needed while maintaining energy efficiency during regular use.
Set subdued lighting levels for nighttime navigation that won’t disturb sleeping family members or guests. Program dimmer controls to automatically adjust throughout the day, creating optimal lighting conditions that match your household’s daily routines and activities.


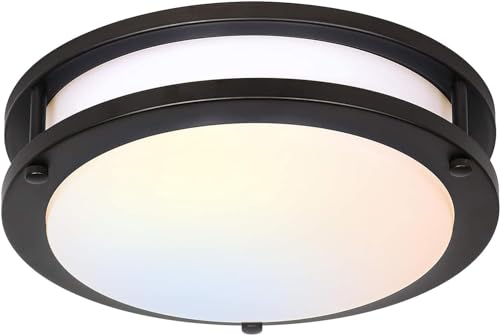
Select Flush Mount Fixtures for Low-Ceiling Hallways

Low ceiling hallways require careful lighting considerations to maintain both functionality and visual appeal. We’ll explore flush mount answers that provide optimal illumination without compromising valuable headroom.
Maximize Headroom While Providing Adequate Light
Flush mount fixtures solve the common problem of insufficient ceiling clearance by sitting directly against the ceiling surface. These unobtrusive fixtures distribute light evenly throughout the space while preserving every inch of headroom for comfortable walking.
Design features that maximize effectiveness include:
- Downward-facing illumination that prevents harsh shadows and provides consistent coverage
- Wide light distribution patterns that eliminate dark corners and create uniform brightness
- Low-profile construction that maintains clean ceiling lines without visual obstruction
- Multiple mounting options that accommodate various ceiling types and electrical configurations
Most flush mount fixtures extend only 2 to 4 inches from the ceiling, making them ideal for hallways with 8-foot ceilings or lower. We recommend selecting fixtures with frosted or diffused glass shades to prevent glare while maintaining adequate brightness levels.
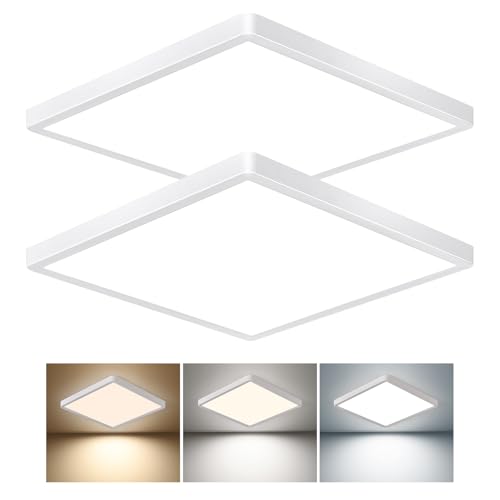
Choose LED Options for Energy Efficiency
LED flush mount fixtures offer superior energy efficiency compared to traditional incandescent or fluorescent alternatives. These fixtures consume up to 80% less energy while providing the same light output, making them a sustainable choice for frequently used hallway spaces.
Key benefits include:
| Feature | LED Advantage | Traditional Comparison |
|---|---|---|
| Lifespan | 25,000+ hours | 1,000-2,000 hours |
| Energy Usage | 9-12 watts | 60-100 watts |
| Heat Output | Minimal | Important |
| Maintenance | Rare replacements | Frequent bulb changes |
LED fixtures come in various color temperatures to match different hallway aesthetics. Warm white (2700K-3000K) creates cozy, inviting atmospheres perfect for residential spaces, while cool white (4000K-5000K) provides crisp, clean illumination ideal for modern or contemporary designs.
Design versatility allows LED flush mount fixtures to complement any hallway decor theme. We find that sleek, minimalist designs work well in contemporary spaces, while decorative glass patterns enhance traditional or transitional interiors.


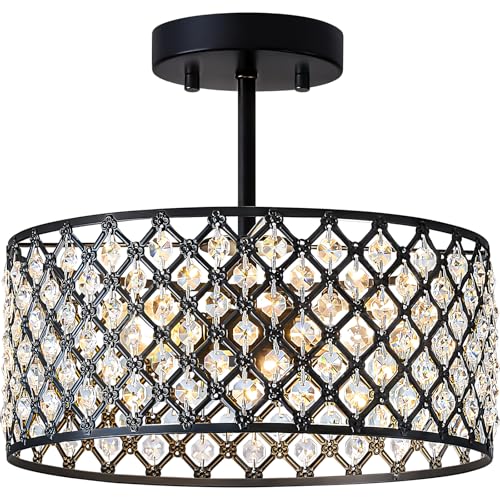
Consider Chandeliers for Grand Entryway Impact

Chandeliers transform grand entryways into dramatic focal points that make lasting first impressions on guests. These statement fixtures combine functional lighting with elegant design elements to create sophisticated atmosphere in larger hallway spaces.
Ensure Proper Height Installation Guidelines
Install chandeliers at least 7 feet from the floor to maintain safe clearance for tall individuals walking beneath them. This minimum height requirement prevents head injuries while ensuring adequate illumination distribution throughout the space.
Position fixtures higher in grand entryways with soaring ceilings to create proper visual balance and prevent the chandelier from appearing lost in the vertical space. We recommend adding 3 inches of clearance for every additional foot of ceiling height above 8 feet.
Consider the chandelier’s hanging mechanism when calculating final installation height, as chain or cord length can be adjusted during installation to achieve the perfect positioning. Professional electricians typically allow for 6 to 12 inches of adjustment flexibility during the mounting process.
Measure twice before installation to account for any furniture pieces like console tables or benches that might be positioned below the fixture. We suggest maintaining at least 30 inches of clearance between the chandelier’s lowest point and any furniture surfaces.
Balance Size with Hallway Proportions
Select chandelier diameter based on hallway width to maintain visual harmony without overwhelming the space or appearing too small for the setting. We recommend choosing fixtures that measure roughly one-third the width of your hallway for optimal proportional balance.
Match the fixture’s visual weight to your entryway’s architectural features, ensuring that ornate chandeliers complement formal design elements while simpler styles work better in minimalist spaces. Large crystal chandeliers suit traditional grand foyers, while sleek metal designs enhance contemporary entryways.
Account for hallway length when choosing chandelier size, as longer corridors can accommodate larger fixtures without appearing cramped or disproportionate. We suggest measuring the hallway’s square footage and selecting fixtures with diameter measurements that equal roughly 2.5 to 3 inches per square foot of space.
Consider multiple smaller chandeliers for exceptionally long hallways instead of one oversized fixture, creating rhythm and visual interest while maintaining proper scale relationships. This approach works particularly well in formal residential corridors and commercial building entryways.


Install Motion Sensor Lights for Practical Convenience

Motion sensor technology transforms your hallway into a smart, responsive space that illuminates automatically as you move through it. These innovative fixtures use passive infrared (PIR), ultrasonic, or dual technology sensors to detect movement and provide lighting exactly when needed.
Choose Battery-Powered Options for Easy Installation
Battery-powered motion sensor lights eliminate the need for hardwiring, making installation incredibly straightforward in existing hallways. We recommend these wireless options because they offer flexible placement without requiring access to electrical wiring or professional installation services.
Retrofit existing spaces easily with battery-powered units that mount directly to walls or ceilings using simple brackets or adhesive backing. Your hallway can benefit from motion sensing technology without the disruption of running new electrical lines or cutting into walls.
Position fixtures strategically anywhere along your hallway walls or ceiling to achieve optimal motion detection coverage. Battery-powered sensors allow you to experiment with placement and adjust positioning as needed without being constrained by existing electrical outlets.
Maintain minimal disruption during installation since these units require no electrical work or permits. We find that most battery-powered motion sensor lights can be installed in under 30 minutes using basic tools like screwdrivers and wall anchors.
Set Appropriate Sensitivity and Timer Settings
Adjusting sensor sensitivity prevents unwanted activation from pets or passing shadows while ensuring reliable detection of human movement. We recommend starting with medium sensitivity settings and fine-tuning based on your hallway’s exact conditions and traffic patterns.
Configure timer settings to match your typical hallway usage, with studies showing that workplace lighting with motion sensors and appropriate delay settings can reduce energy consumption by 22-32%. Your hallway fixtures can achieve similar efficiency by using 10-minute or 30-minute timer settings depending on foot traffic frequency.
Prevent false triggers by adjusting PIR sensor sensitivity to respond primarily to infrared radiation from warm bodies rather than environmental changes. We suggest testing different sensitivity levels during various times of day to find the optimal balance between responsiveness and energy efficiency.
Optimize energy savings by selecting timer durations that align with your family’s movement patterns through the hallway. Shorter timer settings work well for frequently used passages, while longer delays suit hallways with sporadic traffic throughout the day.


Layer Multiple Light Sources for Complete Coverage

Effective hallway lighting relies on combining different fixture types to eliminate shadows and create uniform illumination. We’ll show you how to strategically layer various light sources for optimal coverage and visual appeal.
Combine Task and Ambient Lighting Elements
Ambient lighting forms the foundation of our hallway illumination strategy, providing general brightness that welcomes family and guests. Standard bulbs like GU10 or GLS work perfectly for creating this warm, overall glow that makes corridors feel inviting and spacious.
Task lighting targets exact functional areas where focused illumination proves essential. We position these fixtures near staircases, entryways, and reading nooks to ensure safety and usability. Accent lighting adds the finishing touch by highlighting artwork, architectural features, or decorative elements along the hallway walls.
Balance becomes crucial when combining these lighting elements. We recommend using ambient fixtures to establish base illumination levels, then adding task lighting where exact activities occur. Accent lighting should complement rather than compete with other sources, creating depth and visual interest without overwhelming the space.
Layering these three lighting types creates a comprehensive system that adapts to different needs throughout the day. During evening hours, we can rely primarily on ambient lighting for gentle navigation, while brighter task lighting activates when detailed work or safety requires enhanced visibility.
Create Visual Interest with Varied Heights
Flush mount and semi-flush mount lights work best for low to medium ceiling heights, delivering even illumination without consuming valuable headroom. These fixtures provide clean, unobtrusive lighting that suits most residential hallway applications.
Recessed lights offer a modern aesthetic by blending seamlessly into ceiling surfaces. We install these fixtures to create sleek, contemporary looks while maintaining consistent light distribution throughout the corridor.
Pendant lights excel in high ceiling applications where dramatic visual impact enhances the space. These fixtures should hang at least 7 feet from the floor to prevent obstruction while creating striking focal points.
Strategic placement ensures each fixture type contributes effectively to overall illumination. We space ceiling lights every 8 to 10 feet for balanced coverage, while wall sconces perform best at eye level (5 to 6 feet from the floor) with 6 to 8 foot intervals between fixtures.
Height variation prevents monotonous lighting arrangements that can make hallways feel sterile or institutional. Combining ceiling mounted fixtures with wall sconces at different elevations creates ever-changing visual layers that transform ordinary corridors into captivating architectural features.


Choose Energy-Efficient LED Hallway Lighting Fixtures

LED fixtures represent the smartest investment for hallway lighting, delivering superior energy efficiency and exceptional longevity. We’ve seen these fixtures transform both residential and commercial spaces while dramatically reducing operating costs.
Calculate Long-Term Cost Savings
Energy consumption drops by up to 90% when we switch from traditional incandescent bulbs to LED hallway fixtures. Our utility bills reflect immediate savings as these efficient lights consume significantly less electricity for the same brightness output.
Replacement costs virtually disappear with LED fixtures lasting up to 25 times longer than conventional bulbs. Integrated LED modules can operate for up to 50,000 hours, meaning we replace fixtures far less frequently and reduce maintenance expenses over time.
Operating expenses decrease substantially when we factor in both energy and replacement savings. The initial investment in LED hallway lighting pays for itself through reduced electricity consumption and minimal maintenance requirements across the fixture’s extended lifespan.
Select Appropriate Color Temperature
Warm white LEDs ranging from 2700K to 3000K create cozy ambiance perfect for residential hallways. These temperatures provide comfortable illumination that makes transitional spaces feel welcoming and inviting for family members and guests.
Neutral white options between 3500K and 4000K offer balanced lighting suitable for most hallway applications. We find this temperature range works exceptionally well in contemporary homes where we want neither too warm nor too cool of an atmosphere.
Cool white LEDs at 5000K deliver bright, task oriented illumination ideal for commercial hallways and utility corridors. These fixtures provide excellent visibility for safety and security purposes while maintaining energy efficiency in high traffic areas.
Selectable color temperature features allow us to adjust lighting based on time of day or exact needs. Many modern LED hallway fixtures include this functionality, giving us flexibility to create different moods and optimize illumination for various activities throughout our daily routines.


Plan Professional Installation for Complex Fixtures

Complex hallway lighting installations require careful preparation and often professional expertise to ensure safety and optimal performance.
Know When to Call an Electrician
Certain hallway lighting installations demand professional electrical expertise for safety and compliance reasons. We recommend calling a licensed electrician when you encounter aluminum wiring, which appears dull gray rather than the dull orange color of copper wiring. Complex fixtures like multi-light chandeliers require structural assessment to ensure your ceiling can support the weight properly.
Smart lighting systems with automation controls need specialized wiring and programming knowledge that professionals possess. Heavy fixtures exceeding standard mounting capabilities require reinforced electrical boxes and proper anchoring techniques. Extensive rewiring projects involving new circuits or unfamiliar electrical configurations should always involve certified electricians.
High-voltage installations and fixtures requiring structural ceiling modifications need professional assessment and installation. We advise consulting electricians for any project where you’re unsure about existing wiring compatibility or safety requirements.
Understand Local Electrical Code Requirements
All hallway lighting installations must comply with local electrical codes to ensure safety and legal compliance. Codes specify detailed requirements for proper wiring techniques, grounding procedures, and fixture support specifications. Clearance requirements from combustible materials are strictly regulated to prevent fire hazards.
Many jurisdictions require permits and inspections for certain types of electrical work, particularly for new circuits or complex installations. We recommend researching your local regulations before beginning any installation project to avoid costly violations or safety issues.
Fixture mounting requirements vary by location and must support the exact weight and size of your chosen lighting. Grounding standards ensure electrical safety and may require upgraded electrical boxes for older homes. Professional electricians stay current with evolving code requirements and can guarantee compliant installations that pass local inspections.

Conclusion
The right hallway lighting fixtures can completely transform your home’s transitional spaces from overlooked pathways into stunning architectural features. We’ve explored everything from elegant pendant lights and sleek recessed fixtures to versatile track lighting and energy-efficient LED options.
Remember that successful hallway lighting combines functionality with style. Whether you choose sophisticated wall sconces or dramatic chandeliers layering multiple light sources ensures optimal coverage while creating visual interest throughout your space.
Don’t hesitate to consult with professional electricians for complex installations especially when dealing with heavy fixtures or smart lighting systems. By following proper spacing guidelines selecting appropriate color temperatures and maintaining consistent design aesthetics you’ll create inviting well-lit hallways that enhance both safety and your home’s overall value.
Frequently Asked Questions
What are the main benefits of proper hallway lighting?
Proper hallway lighting enhances safety by illuminating walkways, makes narrow spaces appear wider, increases home value, and creates a welcoming atmosphere for family and guests. Well-designed lighting transforms dull transitional spaces into inviting pathways while improving the overall perception of your home’s interior design.
How should I space pendant lights in my hallway?
Space pendant lights based on your ceiling height and hallway width, ensuring at least 7 feet of walking clearance beneath fixtures. For standard 8-10 foot ceilings, maintain 6-8 feet between pendants. Match materials and finishes to your existing decor for a cohesive look throughout the space.
What’s the recommended spacing for recessed lighting in hallways?
Install recessed lights every 8 to 10 feet for optimal light distribution and to avoid dark spots. For short hallways (under 10 feet), use 2-3 fixtures. Medium hallways need 3-4 fixtures, while long hallways require 4 or more fixtures for even illumination throughout the entire corridor.
At what height should wall sconces be installed in hallways?
Install wall sconces at eye level, between 5 to 6 feet from the floor, for optimal light distribution and to prevent harsh shadows. Space fixtures about 6 to 8 feet apart to maintain consistent illumination and avoid dark spots between lighting points.
How can I use track lighting effectively in hallways?
Position track lighting heads to target specific areas like artwork, using a 30-degree angle to minimize glare. Install dimmer controls to adjust brightness for different occasions, from creating welcoming ambiance for guests to providing bright functional lighting for daily tasks and navigation.
What lighting works best for low-ceiling hallways?
Flush mount fixtures are ideal for low ceilings as they sit directly against the ceiling without compromising headroom. Choose LED options for energy efficiency and minimal heat output. These fixtures provide wide light distribution to eliminate dark corners while maintaining a sleek appearance.
How do motion sensor lights benefit hallway lighting?
Motion sensor lights automatically illuminate as you move through the space, enhancing convenience and safety. Battery-powered options allow flexible placement without hardwiring. Adjust sensitivity and timer settings to prevent false triggers and optimize energy savings while ensuring reliable activation when needed.
What does layering light sources mean for hallways?
Layering involves combining ambient, task, and accent lighting for complete coverage. Ambient lighting provides overall warm glow, task lighting focuses on functional areas, and accent lighting highlights decorative elements. Vary fixture heights to create visual interest and eliminate shadows throughout the space.
How much energy can LED hallway lighting save?
LED fixtures can reduce energy consumption by up to 90% compared to traditional incandescent bulbs, leading to significant long-term cost savings. LED lights last up to 25 times longer than conventional bulbs, minimizing replacement costs and maintenance expenses over their extended lifespan.
When should I hire a professional for hallway lighting installation?
Consult licensed electricians for complex installations involving aluminum wiring, heavy fixtures, or smart lighting systems. Professional installation ensures compliance with local electrical codes, prevents fire hazards, and avoids costly violations. Complex electrical work requires specialized knowledge for safety and proper functionality.