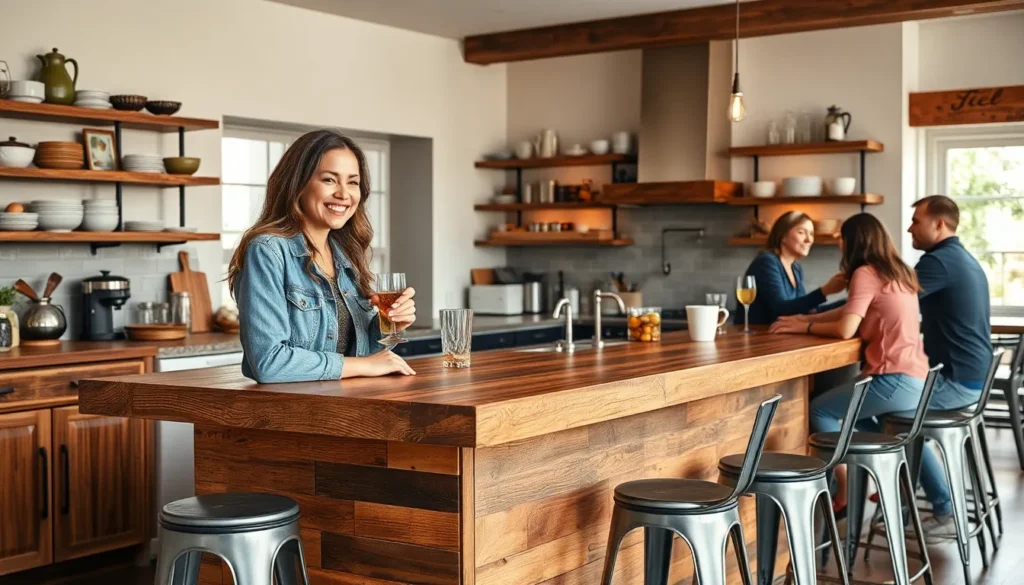
We’ve all dreamed of that perfect kitchen bar where morning coffee flows seamlessly into evening cocktails with friends. Whether you’re working with a spacious open-plan layout or a cozy galley kitchen, the right bar design can transform your cooking space into the heart of your home.
Kitchen bars aren’t just about extra seating – they’re multifunctional powerhouses that boost storage, create natural conversation zones, and add serious style points to your space. From sleek waterfall countertops to rustic reclaimed wood designs, we’ve discovered countless ways to make your kitchen bar both beautiful and brilliantly practical.
Ready to explore the endless possibilities? We’ll walk you through inspiring ideas that’ll help you create a kitchen bar that perfectly matches your lifestyle, budget, and space constraints while maximizing both form and function.
Transform Your Kitchen Island Into a Functional Bar Space
Your existing kitchen island can become the perfect entertainment hub with strategic modifications that maximize both form and function.
Add Bar-Height Seating for Casual Dining
Elevate your kitchen island to counter height by adding a raised section that measures 42 inches tall. This creates the ideal spot for breakfast service and casual conversation while maintaining clear sightlines across your kitchen.
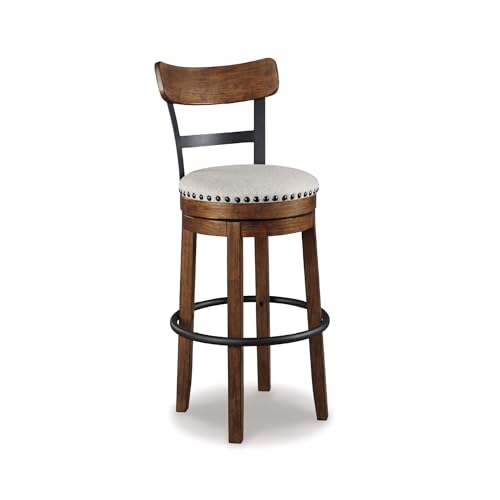
Install comfortable bar stools with backs to encourage longer conversations. We recommend choosing swivel stools with footrests for maximum comfort during extended use.
Create a breakfast bar overhang that extends 12 to 15 inches beyond your island’s base. This provides adequate knee room for diners while keeping the seating area separate from your food prep zone.
Position your bar seating to face your main kitchen workspace. This arrangement lets you interact with family and guests while cooking without turning your back to the conversation.
Install a Wine Cooler or Beverage Station
Designate one side of your kitchen island for a built in wine refrigerator that holds 24 to 46 bottles. This placement keeps beverages easily accessible while maintaining the island’s primary cooking functions.
Add a small sink next to your beverage station for rinsing glassware and adding water to drinks. A 15 inch bar sink fits perfectly without overwhelming your island’s proportions.
Install an ice maker beneath your island countertop to complete your beverage service area. Built in ice makers produce 25 to 50 pounds of ice daily, ensuring you’re always ready for entertaining.
Include open shelving above your wine cooler to display glassware and cocktail accessories. Glass shelves reflect light and create an upscale bar atmosphere in your kitchen space.
Incorporate Built-In Storage for Barware
Design deep drawers beneath your island’s bar section to store cocktail shakers, mixing tools, and serving trays. Soft close drawer slides prevent noise during entertaining and protect your barware from damage.
Add vertical dividers inside your drawers to organize different types of glassware. Custom foam inserts keep wine glasses, cocktail glasses, and tumblers separated and secure.
Install pull out shelves in your island’s base cabinets for easy access to bottles and bar accessories. These shelves extend fully, letting you reach items stored in the back without removing everything in front.
Create a dedicated utensil drawer with compartments for bottle openers, corkscrews, and cocktail strainers. Felt lined compartments protect metal tools and reduce noise when accessing your bar supplies.


Create a Sleek Breakfast Bar With Minimal Design
 1")
A minimalist approach to breakfast bar design emphasizes clean lines and uncluttered surfaces that complement your kitchen’s existing functionality. This design philosophy transforms your space into a contemporary gathering spot without overwhelming the overall aesthetic.
Choose Waterfall Countertops for Modern Appeal
Waterfall countertops create dramatic visual impact by extending your counter material vertically to meet the floor. This architectural feature serves as a striking focal point while maintaining the streamlined aesthetic essential to minimalist design. Quartz and solid surfacing materials work exceptionally well for waterfall installations due to their durability and seamless appearance.
The continuous flow of material from horizontal to vertical surfaces eliminates visual breaks that can disrupt a clean design. We recommend choosing materials with subtle veining or solid colors to maintain the minimalist principle of simplicity. These countertops also provide excellent structural support for your breakfast bar while adding contemporary architectural interest to the space.
Select Streamlined Bar Stools in Neutral Tones
Bar stools with slender frames and simple silhouettes complement the minimalist breakfast bar aesthetic perfectly. Choose designs that feature clean geometry and avoid ornate details that might compete with your streamlined countertops. Metal frames offer exceptional durability while maintaining the sleek profile essential to modern kitchen design.
Neutral color palettes including gray, white, and black prevent visual clutter and ensure your stools integrate seamlessly with the overall design scheme. Upholstered seats in muted hues provide comfort without sacrificing the minimalist aesthetic. We suggest selecting stools with consistent heights that align with your counter elevation for both functionality and visual harmony.
Add Under-Counter Lighting for Ambiance
LED strip lighting installed beneath your breakfast bar countertop provides both task illumination and ambient atmosphere. This indirect lighting technique highlights the sleek design elements while creating a warm, inviting environment for casual dining and conversation. The soft glow enhances the waterfall countertop’s material characteristics and adds depth to your minimalist design.
Strategic placement of under-counter lighting eliminates harsh shadows and creates visual continuity along the bar’s length. We recommend choosing LED strips with adjustable brightness controls to accommodate different times of day and activities. This lighting solution maintains the clean aesthetic by remaining hidden from view while delivering functional illumination for your breakfast bar area.


Design a Rustic Farmhouse Kitchen Bar
 2")
Rustic farmhouse kitchen bars create a warm and inviting atmosphere that perfectly balances functionality with timeless charm. We’ll explore authentic design elements that transform your kitchen into a cozy gathering space.
Use Reclaimed Wood for Bar Countertops
Reclaimed wood countertops provide an authentic rustic foundation for your farmhouse kitchen bar while supporting sustainable design practices. Oak delivers exceptional durability and rich grain patterns that develop character over decades of use. Pine offers a lighter aesthetic with natural knots and imperfections that enhance the rustic appeal. Maple provides subtle grain variations and excellent resistance to daily wear from bar activities.
Environmental benefits accompany the aesthetic advantages of choosing reclaimed materials for your bar surface. Repurposing old wood reduces waste streams and gives new life to materials that might otherwise end up in landfills. Each piece carries unique history and weathering patterns that can’t be replicated in new lumber.
Proper sealing protects reclaimed wood surfaces from moisture and stains common in bar environments. Food safe finishes maintain the natural wood appearance while providing necessary protection for beverage service areas.
Install Open Shelving for Display and Storage
Open shelving maximizes both storage capacity and visual appeal in rustic farmhouse kitchen bars by showcasing vintage kitchenware and bar essentials. Wood shelving complements reclaimed countertops and maintains design consistency throughout the bar area. Metal brackets add industrial touches while providing sturdy support for heavy glassware and serving pieces.
Strategic placement ensures easy access to frequently used bar items like glasses, cocktail shakers, and serving trays. Upper shelves work perfectly for decorative displays of vintage bottles or collectible barware. Lower shelves provide convenient storage for everyday items that guests might need during entertaining.
Combined materials create visual interest through the interplay of rustic wood planks with wrought iron or aged metal supports. This combination maintains the farmhouse aesthetic while adding structural integrity for heavier storage needs.
Choose Vintage Inspired Bar Accessories
Vintage inspired accessories complete the rustic farmhouse aesthetic through carefully selected decorative and functional elements. Metal lanterns create ambient lighting while serving as striking focal points above the bar area. Antique bottles function as both storage containers and decorative displays that enhance the authentic farmhouse character.
Distressed wooden signs add personalized touches that reflect your family’s personality and hosting style. Old fashioned ice buckets serve practical purposes while contributing to the vintage atmosphere during entertaining. Vintage style barware includes copper mugs, mason jar glasses, and galvanized serving trays that combine functionality with period appropriate design.
Lighting choices significantly impact the overall ambiance of your rustic bar space. Pendant lights with Edison bulbs or vintage chandeliers provide both task lighting and decorative elements. These fixtures create cozy gathering spaces that encourage conversation and relaxation.
Seating selections should complement the rustic aesthetic through distressed finishes and natural materials. Wooden stools with weathered paint or metal frames with aged patina maintain design consistency while providing comfortable perches for bar guests.
Color schemes reinforce the farmhouse theme through earthy tones including warm beiges, rich browns, and sage greens. These natural hues create cohesive design flow while allowing vintage accessories to stand out as accent pieces throughout the bar area.

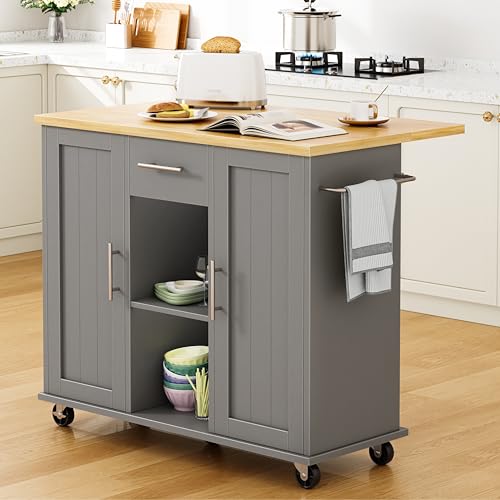
Build a Peninsula Bar for Open Floor Plans
 3")
We’ve found that peninsula bars work exceptionally well in open floor plans where traditional islands might feel too imposing. Peninsula bars connect directly to existing cabinetry while extending into the living space, creating natural boundaries without blocking sightlines.
Maximize Counter Space With Extended Surfaces
Extending your peninsula bar beyond the standard counter depth creates valuable workspace that serves multiple functions. We recommend adding 12 to 18 inches of overhang to accommodate comfortable bar seating while maintaining adequate legroom underneath. This extended surface becomes perfect for morning coffee service, casual meals, or even laptop work sessions.
Smart design choices include incorporating different counter heights within the same peninsula structure. Consider using 36-inch height for food prep on the kitchen side and 42-inch height for the bar seating area. We’ve seen homeowners successfully integrate features like built-in cutting boards, warming drawers, or even small prep sinks within these extended surfaces.
Create Visual Separation Between Kitchen and Living Areas
Visual separation becomes crucial in open floor plans where you want distinct zones without sacrificing flow. We suggest using contrasting materials between your peninsula bar and main kitchen counters to establish clear boundaries. Waterfall edges on the living room side create stunning focal points while reinforcing the separation.
Different flooring materials help define each space effectively. Tile or luxury vinyl in the kitchen transitioning to hardwood in the living area creates natural divisions. We often recommend raising the peninsula bar slightly above standard counter height, which provides subtle separation while maintaining sight lines across the space.
Pendant lighting positioned strategically over the peninsula bar further emphasizes the separation. Choose fixtures that complement both spaces while creating their own defined zone. We’ve found that three evenly spaced pendants work best for most peninsula lengths.
Add Electrical Outlets for Small Appliances
Planning electrical outlets during the peninsula bar design phase prevents costly retrofitting later. We recommend installing GFCI outlets every 4 feet along the bar surface, ensuring you’ll have power wherever you need it for coffee makers, blenders, or phone chargers.
Pop-up outlets offer elegant answers that maintain clean lines when not in use. These spring-loaded receptacles sit flush with the counter surface until activated, then rise to provide convenient power access. We particularly love these for breakfast bars where aesthetics matter as much as functionality.
Consider adding USB charging ports alongside traditional outlets to accommodate modern device needs. Under-counter outlets work well for permanently installed appliances like mini fridges or wine coolers, keeping cords hidden while maintaining accessibility for maintenance.
Install a Wall-Mounted Bar in Small Kitchens
 4")
Wall-mounted bars revolutionize small kitchen spaces by eliminating the need for floor space while delivering instant functionality. Folding designs allow you to create an on-demand bar area that disappears when not needed, making this solution perfect for compact kitchens.
Use Vertical Space With Fold-Down Surfaces
Vertical surfaces become valuable real estate when you install fold-down bar tops on walls or cabinet sides. These ingenious surfaces mount securely to studs and fold flat against the wall, creating zero visual clutter when stored. Wall-mounted brackets support weights up to 150 pounds, ensuring your bar can handle drinks, snacks, and casual dining needs.
Installing these surfaces at standard bar height of 42 inches creates comfortable standing room while maintaining sight lines across your kitchen. Cabinet-mounted versions work particularly well on kitchen islands or peninsula ends, where they extend your existing workspace. Professional installation ensures proper weight distribution and smooth folding mechanisms that’ll last for years.
Choose Compact Bar Stools That Tuck Away
Compact stools maximize your floor space by sliding completely under wall-mounted bars when not in use. Backless designs with slim profiles work best for small kitchens, as they create minimal visual weight and store efficiently. Heights between 24 to 30 inches accommodate most wall-mounted bar installations perfectly.
Swivel mechanisms allow easy entry and exit without pulling stools away from the bar, maintaining your kitchen’s tight clearances. Materials like powder-coated metal or molded plastic provide durability while keeping weight manageable for frequent moving. Stack-able options offer even greater space savings, allowing you to store multiple stools in single cabinet spaces.
We recommend choosing stools with built-in footrests for comfort during longer seating periods. Neutral colors like black, white, or natural wood tones complement any kitchen style while remaining timeless.
Add Floating Shelves Above for Glassware Storage
Floating shelves transform wall space above your bar into functional storage for glasses, bottles, and barware accessories. Installing shelves 18 to 24 inches above your bar surface provides easy access while preventing accidents from reaching too high. Three-tier arrangements work well for organizing different glass types and bottle sizes.
Glass shelves create an airy feel that won’t overwhelm small spaces, while wood options add warmth and match existing cabinetry. We suggest installing LED strip lighting underneath each shelf to showcase your glassware collection and provide ambient lighting for evening entertaining.
Weight capacity becomes crucial when storing heavy bottles, so choose brackets rated for at least 50 pounds per shelf. Spacing shelves 12 to 15 inches apart accommodates wine bottles standing upright while leaving room for taller cocktail glasses. Consider adding subtle lip edges to prevent items from sliding off during kitchen activities.


Design an Industrial-Style Kitchen Bar
 5")
Industrial style brings raw sophistication to kitchen bars through carefully selected materials and design elements. We’ll explore how to create this urban aesthetic using authentic industrial components.
Incorporate Metal and Concrete Elements
Metal frameworks form the backbone of any authentic industrial kitchen bar design. Steel or iron legs provide structural integrity while adding visual weight that anchors the space. We recommend using blackened steel for bar frames and incorporating metal shelving systems that showcase glassware and bottles.
Concrete countertops deliver the rugged durability that defines industrial style. These surfaces develop character over time and pair beautifully with metal accents. We suggest considering concrete floors beneath the bar area to create a cohesive foundation that reinforces the industrial theme.
Stainless steel appliances integrate seamlessly into this design approach. Wine coolers with exposed metal components and industrial grade refrigerators enhance both functionality and aesthetic appeal. We find that mixing different metal finishes like brushed steel with raw iron creates visual depth without compromising the style’s authenticity.
Use Exposed Brick or Pipe Details
Exposed brick walls create instant industrial ambiance behind kitchen bars. Raw brick textures add warmth to the typically cool industrial palette while maintaining the style’s authentic character. We recommend highlighting existing brick walls or installing thin brick veneer for similar visual impact.
Exposed ductwork and pipes contribute architectural interest above bar areas. These functional elements become decorative features when properly integrated into the design. We suggest painting pipes in coordinating colors or leaving them in their natural metallic finish for maximum industrial appeal.
Conduit wiring systems offer another opportunity to showcase industrial details. Running electrical lines through exposed metal conduit reinforces the utilitarian aesthetic while providing practical functionality. We find that strategic placement of these elements creates visual rhythm throughout the bar area.
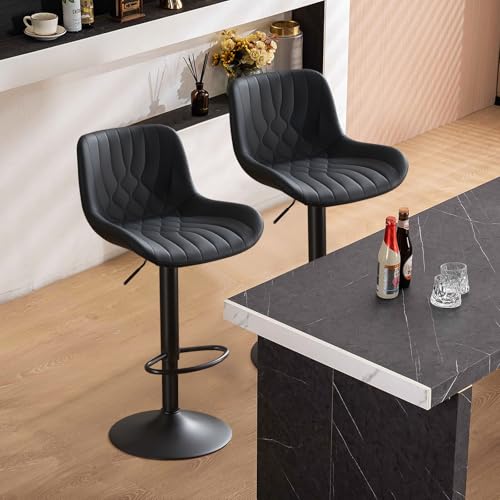
Select Industrial Bar Stools With Metal Frames
Metal framed bar stools anchor the industrial aesthetic while providing comfortable seating. Vintage inspired designs featuring steel or iron construction offer durability and authentic styling. We recommend choosing stools with adjustable heights to accommodate different users and bar configurations.
Canvas or leather upholstery complements metal frames perfectly in industrial settings. These materials age gracefully and develop character that enhances the overall design. We suggest selecting neutral colors like charcoal gray or cognac brown to maintain the industrial color palette.
Backless designs maximize visual openness around the bar area. These streamlined options allow the bar’s structural elements to remain the focal point while providing flexible seating arrangements. We find that mixing different stool heights creates ever-changing visual interest while maintaining design cohesion.
| Element | Material Options | Design Impact |
|---|---|---|
| Bar Frame | Steel, Iron, Blackened Metal | Structural foundation |
| Countertops | Concrete, Metal, Butcher Block | Surface durability |
| Lighting | Metal Shades, Exposed Bulbs | Atmospheric enhancement |
| Seating | Metal Frames, Canvas/Leather | Functional comfort |


Create a Wet Bar Area for Entertaining
 6")
Building a dedicated wet bar area transforms your kitchen into the ultimate entertaining hub. This specialized zone combines functionality with style to create a seamless beverage service experience.
Install a Small Sink for Easy Cleanup
Installing a compact sink in your wet bar area creates immediate cleanup convenience during parties and gatherings. We recommend choosing a 15-inch undermount sink that won’t overwhelm the space while providing essential washing capabilities for glasses and bar tools.
Position the sink strategically between your beverage storage and preparation areas to maximize workflow efficiency. Complement your sink installation with a sleek faucet featuring a pull-down sprayer for versatile cleaning tasks.
Consider adding a small drying rack or towel bar nearby to complete your cleanup station. This thoughtful placement keeps wet glasses organized while maintaining the bar’s polished appearance throughout your entertaining events.
Add Wine Storage and Glass Racks
Incorporating wine storage keeps your collection organized and easily accessible during social gatherings. We suggest installing built-in wine cubbies that accommodate 12 to 24 bottles depending on your available space and entertaining frequency.
Mount glass racks underneath your upper cabinets or floating shelves to display stemware attractively while keeping it within arm’s reach. These racks typically hold 6 to 12 glasses and create an elegant visual element that showcases your barware collection.
Design your storage with both everyday wines and special occasion bottles in mind. Add a small wine cooler if space permits to maintain optimal serving temperatures for different varietals.
Include Ice Maker or Mini Refrigerator
Adding an ice maker or mini refrigerator ensures your beverages stay perfectly chilled throughout entertaining sessions. Built-in ice makers produce 20 to 30 pounds of ice daily, eliminating frequent trips to your main kitchen freezer during parties.
Select a 24-inch undercounter refrigerator that can store mixers, beer, and other cold beverages alongside your ice supply. These compact units typically offer 5 to 6 cubic feet of storage while maintaining the streamlined appearance of your wet bar design.
Position your cooling appliances near electrical outlets and ensure proper ventilation for optimal performance. Consider models with glass doors to showcase your beverage collection while maintaining easy visibility of your drink options.


Build a Two-Tier Kitchen Bar for Multi-Purpose Use
 7")
Two-tier kitchen bars maximize functionality by creating distinct levels for different activities. This versatile design transforms your kitchen into a well-organized space that serves multiple purposes simultaneously.
Separate Prep Space From Dining Area
Two-tier kitchen bars effectively divide food preparation from dining activities through strategic height differences. The lower tier functions as an extension of your countertop workspace, providing dedicated area for chopping vegetables, mixing ingredients, and organizing cooking tools. Meanwhile, the upper tier serves as a clean dining surface where family and guests can enjoy meals without interfering with kitchen workflow.
Smart placement of the two-tier system prevents cross-contamination between cooking and eating zones. We recommend positioning the prep tier at standard counter height of 36 inches, while elevating the dining section to bar height of 42 inches. This height differential creates a natural barrier that keeps cooking activities separate from social dining spaces.
Storage answers integrate seamlessly beneath each tier to maintain organization. Lower cabinets under the prep section can house cutting boards, mixing bowls, and food storage containers. Upper tier storage typically accommodates dishes, glassware, and serving pieces for easy access during meal service.
Accommodate Different Heights for Various Activities
Variable height configurations in two-tier kitchen bars support diverse daily activities and user needs. Standard counter height works perfectly for detailed food preparation tasks like rolling dough, decorating cakes, or assembling complex dishes that require precision work. Bar height sections excel for quick meals, casual conversation, and activities that benefit from standing or perching positions.
Ergonomic considerations ensure comfort across different user heights and age groups. Children can safely participate in cooking activities at the lower prep level, while adults appreciate the bar height for quick breakfasts or evening drinks. We suggest maintaining at least 6 inches of height difference between tiers to create clear functional distinction.
Activity-exact design elements enhance each tier’s purpose and usability. The prep level might feature built-in cutting board slots, knife storage, or small appliance garages. Bar level enhancements include footrests, comfortable overhang depth of 12-15 inches for knee room, and convenient electrical outlets for devices.
Create Zones for Cooking and Socializing
Two-tier kitchen bars establish clear boundaries between active cooking zones and social gathering areas. The cooking zone encompasses the lower prep tier along with adjacent appliances, creating an efficient triangle for meal preparation workflow. Social zones center around the elevated bar tier, where conversation flows naturally while keeping guests away from hot surfaces and sharp tools.
Visual separation techniques reinforce the functional division between cooking and socializing spaces. Different materials, lighting fixtures, or decorative elements help define each zone’s character and purpose. We often see granite or butcher block on prep surfaces paired with quartz or marble on dining sections to emphasize their distinct roles.
Traffic flow optimization prevents congestion during busy cooking and entertaining periods. The two-tier design naturally guides movement patterns, allowing cooks to work efficiently while guests congregate comfortably at the social tier. Strategic placement of bar stools on one side only maintains clear pathways for kitchen workflow and emergency access.


Design a Curved Kitchen Bar for Unique Appeal
 8")
Curved kitchen bars offer both aesthetic charm and practical functionality, creating a welcoming focal point that invites conversation. These organic shapes transform standard angular designs into visually appealing features that enhance modern kitchen layouts.
Soften Sharp Corners With Rounded Edges
Rounded edges eliminate the harsh lines of traditional rectangular bars while creating a safer environment for families. Sharp corners pose injury risks in busy kitchens, but curved designs significantly reduce these hazards through their organic shapes. Materials like quartz, granite, and wood work exceptionally well for curved bar construction, offering both durability and style flexibility.
We recommend creating smooth transitions between the curved bar and existing countertops to maintain visual continuity. The rounded design naturally draws people together, making conversations feel more intimate and inclusive. This softer approach to kitchen design creates a more welcoming atmosphere that encourages social interaction throughout the cooking and dining experience.
Enhance Traffic Flow Around the Kitchen
Curved bars create natural footpaths that allow people to move more freely around the kitchen space. The organic shape eliminates bottlenecks that typically occur at sharp corners, particularly beneficial in open-plan homes where kitchens connect to living or dining areas. We’ve found that curved designs improve navigation by providing multiple approach angles rather than forcing single-direction movement.
Optimal placement requires considering the kitchen’s existing layout to ensure adequate clearance for movement around all sides. The curved shape allows traffic to flow naturally around the bar without creating awkward navigation patterns. This design particularly benefits busy households where multiple people frequently use the kitchen simultaneously, reducing congestion and improving overall functionality.
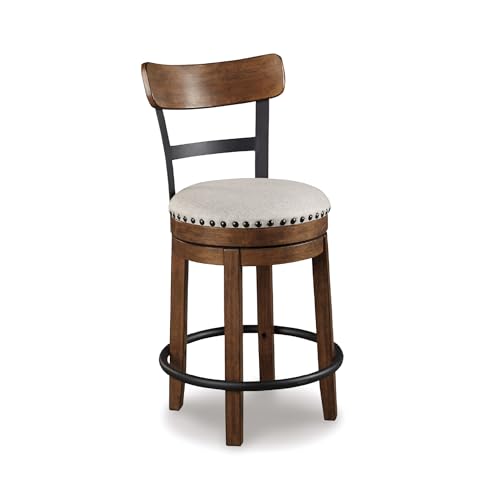
Choose Swivel Bar Stools for Easy Movement
Swivel bar stools maximize the curved bar’s functionality by allowing users to rotate freely without repositioning the entire seat. These rotating seats accommodate more guests in smaller spaces since people can easily turn to face different directions or conversations. We recommend selecting swivel stools that complement the bar’s curved aesthetic while providing comfortable support for extended sitting.
The combination of curved bars and swivel stools creates exceptional space efficiency, particularly valuable in compact kitchens where every square foot matters. Backless swivel designs work especially well with curved bars, maintaining visual openness while providing maximum flexibility. This pairing allows the curved bar to serve multiple functions simultaneously, from casual dining to workspace to social gathering spot, adapting seamlessly to different usage patterns throughout the day.


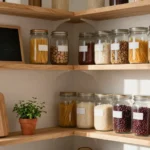
Incorporate Smart Storage Solutions Into Your Kitchen Bar
 9")
Building on your kitchen bar foundation, we’ll explore storage innovations that maximize functionality while maintaining aesthetic appeal.
Add Pull-Out Drawers for Bar Tools
Pull-out drawers transform under-counter space into organized command centers for your bar essentials. We recommend installing these drawers directly beneath your bar counter to provide easy access to frequently used tools like shakers, strainers, and jiggers. These sliding compartments keep everything neatly organized and completely out of sight when not in use.
Consider compartmentalized drawer inserts to separate different tool categories. Soft-close mechanisms prevent slamming and protect your glassware from vibrations. Full-extension slides allow you to access items stored in the very back of deep drawers.
Install Wine Racks Under the Counter
Wine racks beneath your counter create efficient storage while preserving your kitchen’s sleek appearance. We suggest built-in horizontal racks that store bottles at the proper angle to keep corks moist and wine properly aged. These under-counter answers free up valuable counter space for food preparation and serving.
Custom-built wine storage can accommodate both standard 750ml bottles and larger champagne bottles. Temperature-controlled units protect your collection from kitchen heat fluctuations. Angled storage racks make label reading effortless and bottle selection quick during entertaining.
Create Hidden Storage for Electronics and Chargers
Hidden compartments revolutionize how we manage modern kitchen electronics without compromising visual appeal. We recommend designing dedicated cabinets with built-in charging stations for tablets, phones, and smart home devices. These concealed spaces maintain your bar’s clean aesthetic while keeping essential electronics accessible.
Ventilated storage prevents overheating of charging devices and small appliances like coffee makers or blenders. Cable management systems route power cords through hidden channels in your cabinetry. Retractable doors or panels provide quick access while maintaining the illusion of seamless cabinetry when closed.
Conclusion
Creating the perfect kitchen bar transforms your space into a functional hub that serves multiple needs. Whether you’re drawn to sleek minimalist designs or rustic farmhouse charm, there’s a style that’ll complement your home perfectly.
We’ve explored answers for every space – from compact wall-mounted options for small kitchens to impressive two-tier configurations for larger homes. Smart storage integration and thoughtful material choices ensure your bar looks stunning while handling daily demands.
Your kitchen bar should reflect your lifestyle and entertaining needs. With these design ideas as your foundation, you’re ready to create a space that brings people together while adding lasting value to your home.
Frequently Asked Questions
What are the main benefits of adding a kitchen bar to my home?
Kitchen bars enhance both functionality and aesthetics by providing extra seating, increasing storage capacity, and fostering social interaction. They create a casual dining space, serve as an entertaining hub, and can help define different areas in open floor plans while maximizing your kitchen’s potential.
How can I transform my existing kitchen island into a functional bar?
Add bar-height seating with comfortable stools, install a wine cooler or beverage station, and incorporate built-in storage for barware. Create a breakfast bar overhang for knee room, add a small sink, and install deep drawers with vertical dividers for organizing glassware and accessories.
What defines a minimalist breakfast bar design?
Minimalist breakfast bars feature clean lines, uncluttered surfaces, and waterfall countertops for modern appeal. Use streamlined bar stools in neutral tones with slender frames, and add hidden under-counter LED lighting for both task illumination and ambiance while maintaining a sleek aesthetic.
How do I create a rustic farmhouse kitchen bar?
Use reclaimed wood for countertops, install open shelving for vintage kitchenware display, and incorporate vintage-inspired accessories like metal lanterns. Add pendant lights with Edison bulbs for cozy ambiance, choose distressed finishes, and use earthy color schemes to maintain the farmhouse theme.
What makes peninsula bars ideal for open floor plans?
Peninsula bars connect directly to existing cabinetry, creating natural boundaries without blocking sightlines. They maximize counter space with 12-18 inch overhangs for comfortable seating, allow for varying counter heights, and help define spaces while maintaining visual flow between kitchen and living areas.
How can I add a bar to a small kitchen?
Install wall-mounted bars with fold-down tops that eliminate floor space needs. Use compact, backless bar stools that tuck away, add floating shelves above for storage, and consider folding designs that can be stored when not in use to maximize functionality in limited space.
What are the key elements of an industrial-style kitchen bar?
Use raw materials like blackened steel frameworks and concrete countertops. Incorporate exposed brick walls, pipe details, and metal-framed bar stools with canvas or leather upholstery. Mix different metal finishes and choose backless designs to maintain visual openness and urban aesthetic.
What should I include in a wet bar area?
Install a compact sink positioned between beverage storage and preparation areas for efficient workflow. Add wine storage, glass racks, an ice maker or mini refrigerator, and organize collections for easy access. These features create an ideal entertaining hub for hosting events.
How do two-tier kitchen bars maximize functionality?
Two-tier bars create distinct levels for different activities – the lower tier serves as prep space while the upper tier functions as a dining area. This design separates cooking from socializing, accommodates various user needs, and optimizes traffic flow while enhancing the overall kitchen experience.
Why should I consider a curved kitchen bar design?
Curved bars create welcoming focal points, soften sharp corners for safety, and enhance traffic flow. They work well with materials like quartz, granite, and wood, create smooth transitions with existing countertops, and pair perfectly with swivel bar stools for maximum space efficiency.
What smart storage solutions work best for kitchen bars?
Install pull-out drawers for bar tools to keep essentials organized and hidden. Add wine racks under the counter for efficient bottle storage while maintaining a sleek appearance. Create dedicated cabinets with built-in charging stations for electronics to maintain a clean, functional aesthetic.