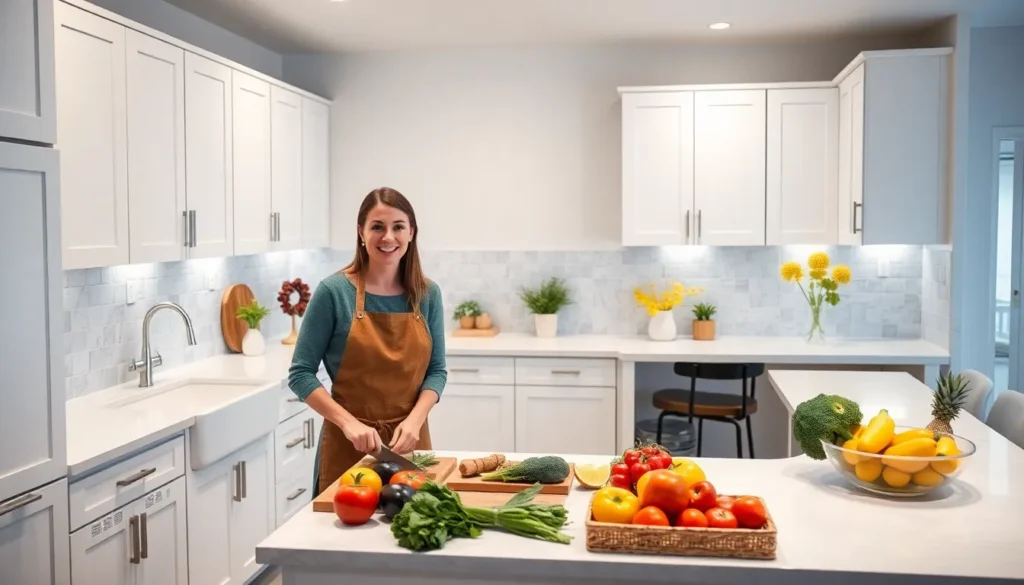
We all know the kitchen is the heart of our home – it’s where we create meals share stories and gather with loved ones. But if your kitchen layout isn’t working for you cooking can become a frustrating chore instead of an enjoyable experience. The good news? A well-designed kitchen layout can transform your daily routine and boost your home’s value.
Whether you’re dealing with a cramped galley kitchen an awkward L-shape or planning a complete renovation we’ve got the answers you need. From maximizing storage in tight spaces to creating efficient work triangles we’ll explore proven layout strategies that professional designers swear by.
Ready to discover how simple changes can revolutionize your cooking space? Let’s jump into the most effective kitchen layout ideas that’ll make your culinary dreams a reality – no matter your budget or square footage.
Galley Kitchen Layout Ideas for Narrow Spaces
Galley kitchens present unique opportunities to create highly efficient workspaces even though their linear design. We’ll show you how to transform these narrow corridors into functional culinary havens that maximize every square inch.
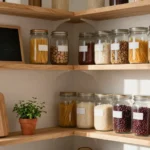
Maximize Vertical Storage Answers
Extending cabinet height to the ceiling transforms wasted space into valuable storage real estate. We recommend installing cabinets that reach the full height of your kitchen walls, adding approximately 30% more storage capacity compared to standard height cabinets.
Adding floating shelves creates accessible storage without overwhelming narrow spaces. Install these shelves 18-24 inches above countertops to store frequently used items like spices, oils, and cooking utensils.
Utilizing wall mounted racks keeps essential tools within arm’s reach while freeing up precious counter space. Mount magnetic knife strips, pot racks, and utensil holders directly on walls between upper and lower cabinets.
Installing overhead storage bins above the refrigerator and in corner spaces captures otherwise unusable areas. These bins work perfectly for storing seasonal items, small appliances, and bulk ingredients.
Install Pull-Out Drawers and Organizers
Replacing lower cabinet shelves with pull-out drawers improves accessibility by 40% according to kitchen design studies. We suggest installing full extension drawer slides that allow complete access to the back of each cabinet.
Adding sliding pantry systems in narrow spaces between appliances creates surprisingly spacious storage. These slim pull-out units typically measure 6-8 inches wide but can hold dozens of canned goods and dry ingredients.
Installing corner cabinet organizers eliminates the frustration of reaching into deep, dark spaces. Lazy Susans and pull-out corner systems make every item easily accessible with a simple rotation or slide.
Incorporating drawer dividers keeps utensils, gadgets, and small items organized within easy reach. Custom dividers maximize drawer space efficiency while preventing the jumbled mess that plagues many narrow kitchens.
Use Light Colors to Create Visual Space
Painting cabinets in white or cream tones reflects natural light throughout the galley, making the space appear 20-30% larger than darker alternatives. We’ve seen dramatic transformations using colors like Pure White, Cloud White, and Ivory Lace.
Selecting light colored backsplashes continues the bright theme while adding texture and interest. Glass subway tiles, marble patterns, and ceramic mosaics in light gray or beige create depth without visual weight.
Choosing pale countertop materials maintains the airy feeling while providing durable work surfaces. Quartz countertops in colors like Arctic White, Calacatta Gold, and Pearl extend the light palette seamlessly.
Adding under cabinet lighting eliminates shadows and enhances the brightness created by light colors. LED strip lights consume minimal energy while providing task lighting that makes narrow galley kitchens feel more spacious and welcoming.
L-Shaped Kitchen Layout Ideas for Corner Efficiency

L-shaped kitchen layouts maximize corner efficiency while creating natural workflow zones. These versatile designs work exceptionally well in smaller spaces where every square foot counts.
Position the Sink in the Corner
Corner sink placement transforms awkward corner spaces into highly functional work zones. This strategic positioning creates an ergonomic workflow that allows you to face into the room while washing dishes or preparing food.
Farmhouse sinks work particularly well in corner installations, adding both style and functionality to your L-shaped design. We recommend choosing a corner sink with rounded edges to prevent bumping and improve accessibility during daily tasks.
Corner positioning also optimizes your plumbing connections, reducing installation costs while creating more usable counter space along the straight sections of your L-shaped layout.
Create a Kitchen Triangle Between Appliances
The traditional kitchen triangle maintains optimal workflow efficiency in L-shaped designs by connecting your stove, refrigerator, and sink. Position your refrigerator and stove along the longer leg of the L formation while placing the sink at the corner intersection.
This triangular configuration keeps your most-used appliances within 4 to 9 feet of each other, reducing unnecessary steps during meal preparation. We suggest avoiding obstacles like islands or peninsulas that might interrupt the natural flow between these three key work zones.
Proper triangle placement ensures you can move seamlessly between cooking, cleaning, and food storage without crossing paths with other family members using the kitchen.
Add an Island for Extra Counter Space
Kitchen islands significantly enhance your L-shaped layout by providing additional counter space and storage answers. Position your island parallel to the shorter leg of the L to maintain optimal traffic flow while creating a natural gathering spot.
Islands serve multiple purposes beyond extra prep space, functioning as casual dining areas, assignments stations, or entertainment zones during parties. We recommend including electrical outlets in your island design to accommodate small appliances and charging stations.
Double L-shaped designs incorporate an L-shaped island opposite your main layout, creating a rectangular configuration with ample space for multiple cooks. This approach works exceptionally well in larger kitchens where you want defined work zones without full separation from adjacent living areas.
U-Shaped Kitchen Layout Ideas for Maximum Storage

U-shaped kitchen layouts provide the ultimate foundation for storage optimization by utilizing three walls of cabinetry. We’ll explore strategic approaches that transform every square inch into functional space while maintaining an efficient workflow.
Install Floor-to-Ceiling Cabinets
Maximize vertical space by dedicating one complete wall to floor-to-ceiling cabinets, ensuring every inch of available height contributes to storage capacity. This design approach adds remarkable depth to your kitchen while creating a cohesive, built-in appearance that elevates the entire space.
Style meets function when you incorporate glass or frosted glass cabinet fronts that reflect natural light throughout the room. These transparent elements prevent the tall cabinets from overwhelming the space while keeping your organized contents visible and accessible.
Strategic placement of floor-to-ceiling units works best on the back wall of your U-shape, where they won’t interfere with daily workflow patterns. Store seasonal items and less frequently used appliances in the upper sections while keeping everyday essentials within easy reach.
Create Multiple Work Zones
Efficient workflow emerges when you divide your U-shaped kitchen into distinct zones like cooking, prep, and cleaning areas that minimize cross-traffic during meal preparation. Each zone should contain the tools and storage exact to its function, reducing unnecessary movement between tasks.
Kitchen triangle optimization becomes effortless in U-shaped layouts by positioning your sink, oven, and refrigerator in a triangular formation that reduces walking distances. This classic design principle ensures smooth movement between the three most-used areas of your kitchen.
Zone-exact storage enhances functionality when you place cutting boards and knives near the prep sink, cooking utensils close to the stove, and cleaning supplies under the main sink. This targeted approach keeps everything exactly where you need it most.
Add Under-Cabinet Lighting
Task lighting transforms food preparation by eliminating shadows cast by overhead fixtures, providing focused illumination exactly where you need it most. Under-cabinet LED strips consume minimal energy while delivering consistent, bright light across your entire workspace.
Visual appeal increases dramatically when under-cabinet lighting highlights decorative elements like granite countertops, subway tiles, or mosaic backsplashes. The gentle upward glow creates depth and dimension that makes your kitchen feel larger and more inviting.
Installation flexibility allows you to choose between hardwired systems for permanent answers or plug-in options for easier DIY installation. Motion-activated lights add convenience for late-night kitchen visits while dimmer switches let you adjust the ambiance for different activities.
Island Kitchen Layout Ideas for Social Cooking

Island layouts transform your kitchen into a central hub where cooking becomes a shared experience. We’ve found these designs work exceptionally well for families who love entertaining while preparing meals.
Design a Multi-Level Island
Two-tier kitchen islands create distinct zones that enhance both functionality and visual appeal in your cooking space. We recommend incorporating different levels for various activities like food preparation and casual dining, which allows you to hide messy cooking areas while maintaining an open feel for guests.
Multi-level designs work particularly well because they establish separate spaces for eating and socializing without disrupting your workflow. You can designate the lower level for prep work and food staging while using the higher tier as a breakfast bar or serving area. This configuration keeps your cooking mess contained while creating natural gathering spots around the island.
Include Seating for Casual Dining
Breakfast bar seating transforms your island into an interactive dining hub where family and friends can gather comfortably. We suggest adding bar stools to create a high-level casual dining area that allows guests to chat with you without interfering with your main cooking tasks.
Strategic seating placement enhances both functionality and aesthetic appeal throughout your kitchen space. Bar-height seating works best for most island configurations because it provides clear sightlines across the room while maintaining comfortable conversation distances. You’ll find that this setup naturally encourages social interaction during meal preparation and creates an inviting atmosphere for everyday dining.
Add Built-In Appliances to the Island
Integrated appliances turn your island into a complete cooking station that streamlines your kitchen workflow significantly. We recommend incorporating built-in sinks, taps, and refrigeration units to create a central location for food preparation and cooking tasks.
Modern islands can accommodate various appliances including prep sinks, wine coolers, and even cooktops depending on your space and needs. Built-in elements help optimize your kitchen’s efficiency by reducing the number of steps between different work areas. This integration creates a more cohesive design while providing easy access to essential tools and utilities during cooking sessions.
Peninsula Kitchen Layout Ideas for Open Floor Plans

Peninsula layouts excel in open floor plans by creating seamless connections between spaces while maintaining kitchen functionality. These versatile designs offer unique answers for modern homes that prioritize both style and efficiency.
Connect the Kitchen to Living Areas
Open concept designs with peninsulas create natural bridges between kitchen and living spaces without sacrificing workspace efficiency. We recommend positioning the peninsula to face your main living area, allowing cooks to engage with family and guests during meal preparation. Visual continuity flows effortlessly when we extend countertop materials from the peninsula into adjacent spaces, creating a cohesive design language throughout your home.
Coordinated finishes between the peninsula and surrounding areas enhance this connection further. We suggest matching cabinet colors or incorporating complementary materials that echo your living room furniture or dining space elements. Lighting plays a crucial role here too – pendant lights above the peninsula can mirror fixtures in adjacent areas, strengthening the visual bond between spaces.
Use the Peninsula as a Room Divider
Functional barriers created by peninsulas define distinct zones without completely closing off spaces like traditional walls would. We position these structures strategically to separate cooking areas from dining or living spaces while maintaining an open feel throughout your home. Zone definition becomes clear when we design peninsulas with varying heights – standard counter height for workspace and bar height for social areas.
Visual separation occurs naturally when we incorporate different materials or colors on each side of the peninsula. Storage answers built into the peninsula’s back side can face the living area, providing display space for books or decorative items while keeping kitchen clutter hidden from view. Upper cabinets or open shelving on the kitchen side maintain functionality without blocking sightlines completely.
Install Bar Seating on One Side
Bar seating transforms peninsulas into social hubs where family and friends gather during cooking and entertaining. We recommend installing seating for 2-4 people depending on your peninsula’s length, with 24 inches of space per person ensuring comfortable dining. Counter overhang of 10-12 inches provides adequate legroom, while bar height seating (42 inches) creates the most comfortable experience for extended conversations.
Storage integration beneath bar seating areas maximizes functionality without compromising comfort. We design custom answers like wine storage, cookbook shelves, or small appliance parking that keeps essentials accessible yet organized. Electrical outlets positioned along the peninsula accommodate charging stations and small appliances, making the space even more versatile for daily use and entertaining needs.
One-Wall Kitchen Layout Ideas for Studio Apartments

Studio apartments benefit tremendously from one-wall kitchen layouts that concentrate all appliances, cabinets, and countertops along a single wall. This linear design maximizes precious floor space while keeping everything within arm’s reach for efficient meal preparation.
Arrange Appliances in Logical Order
Creating an efficient workflow starts with positioning your refrigerator, sink, and stove in a natural sequence that minimizes unnecessary movement during cooking. We recommend placing the refrigerator first, followed by counter space with the sink, then the cooking area with your stove or cooktop. This arrangement supports the natural flow of food preparation—retrieving ingredients, washing and prepping, then cooking.
Optimize your appliance spacing by leaving at least 18 inches of counter space between each major appliance. Consider compact appliances specifically designed for small spaces, such as 18-inch dishwashers or apartment-sized refrigerators that won’t overwhelm your single wall layout.
Use Wall-Mounted Storage Answers
Vertical storage transforms your kitchen walls into valuable organizational real estate without sacrificing floor space. Install floating shelves above your countertops to store dishes, glassware, and frequently used items while maintaining visual openness. Pegboards offer flexible storage for pots, pans, and utensils that can be rearranged as your needs change.
Magnetic strips mounted on walls keep knives safely stored and easily accessible, while hooks attached to the underside of cabinets hold mugs and cooking tools. Wall-mounted spice racks near your cooking area keep seasonings organized and within reach during meal preparation.
| Storage Solution | Function | Space Saved |
|---|---|---|
| Floating shelves | Display and store dishes | Counter space for prep work |
| Pegboards | Hang pots, pans, utensils | Drawer and cabinet space |
| Magnetic strips | Secure knife storage | Counter and drawer space |
| Wall hooks | Hold mugs and tools | Cabinet interior space |
Install a Fold-Down Table for Dining
Space-saving dining answers become essential when your entire kitchen occupies just one wall of your studio apartment. Fold-down tables attached to your kitchen wall or cabinet provide a dining surface that disappears when not needed, preserving your apartment’s open feel. Mount the table at standard dining height (29-30 inches) for comfortable seating.
Consider a hinged table that folds flat against the wall when closed, or explore drop-leaf designs that extend from existing cabinetry. Some models include built-in storage underneath for placemats, napkins, or small kitchen items. These tables can also serve as additional prep space during cooking when you need extra room for ingredient staging or cooling baked goods.
G-Shaped Kitchen Layout Ideas for Large Families

G-shaped kitchens provide the ultimate solution for large families needing ample counter space and efficient storage answers. This layout offers important advantages over other configurations by creating an enclosed workspace that maximizes functionality while maintaining smooth traffic flow.
Create Separate Prep and Cooking Areas
Zone designation transforms G-shaped kitchens into highly efficient workspaces for large families. We recommend positioning major appliances strategically to create distinct areas that prevent congestion during busy meal preparation times. Place the refrigerator on one wing of the G-shape while positioning the stove on the opposite side to establish clear boundaries between prep and cooking zones.
Workflow efficiency improves dramatically when each zone serves a exact purpose. The extended counter space in G-shaped layouts allows multiple family members to work simultaneously without interfering with each other’s tasks. Consider installing different counter heights to accommodate various cooking activities and family members of different ages.
Strategic appliance placement creates natural work triangles within each zone. Position frequently used items like cutting boards and prep tools near the refrigerator area while keeping pots, pans, and cooking utensils close to the stove section. This organization system reduces unnecessary movement and keeps the kitchen running smoothly during peak cooking hours.
Add a Second Sink for Convenience
Dual sink installation eliminates bottlenecks that commonly occur in large family kitchens. We suggest incorporating a second sink into the G-shaped layout to allow multiple users to work simultaneously without creating congestion around a single water source. Position one sink in the main prep area and another in the cleanup zone for maximum efficiency.
Functionality increases significantly when family members can access water independently. The second sink serves multiple purposes, from food preparation and vegetable washing to quick cleanup tasks that don’t require the main dishwashing area. This separation keeps the primary sink available for larger cleaning tasks while smaller jobs continue uninterrupted.
Installation flexibility allows for different sink sizes based on exact family needs. Consider placing a smaller prep sink in the peninsula section of the G-shape while maintaining a larger farmhouse sink in the main workspace. This configuration provides specialized functionality for different kitchen tasks while maximizing the available counter space.
Include a Pantry Wing for Storage
Pantry integration maximizes storage capacity within the G-shaped kitchen footprint. We recommend designing one section of the G-shape as a dedicated pantry wing that provides additional storage for food supplies, small appliances, and kitchen equipment. This approach keeps the main cooking areas organized and clutter free while ensuring everything remains easily accessible.
Storage organization improves when pantry space connects seamlessly with the main kitchen workflow. Position the pantry wing near the prep area to help easy ingredient access during cooking sessions. Install pull-out shelves and adjustable storage systems to accommodate items of varying sizes while maintaining clear visibility of stored goods.
Space utilization reaches its full potential when pantry storage extends from floor to ceiling. The minimum 10-by-10 feet space requirement for G-shaped kitchens allows for substantial vertical storage opportunities within the pantry wing. Include specialized storage answers like spice racks, can dispensers, and bulk storage containers to keep frequently used items organized and readily available for large family meal preparation.
Open Concept Kitchen Layout Ideas for Modern Homes

Open concept kitchens represent the pinnacle of modern home design by seamlessly connecting cooking spaces with living areas. We’ll explore proven strategies that professional designers use to create these flowing, functional environments.
Blend Kitchen and Living Room Design
Integrating your kitchen with living and dining areas creates modern appeal while fostering natural interaction between spaces. We recommend using an L-shaped layout in smaller spaces like studio apartments to maximize functionality while maintaining openness. This design approach enhances the sense of spaciousness by removing visual barriers between rooms.
The seamless connection allows you to engage with family and guests while preparing meals. L-shaped configurations work particularly well because they naturally direct traffic flow around the kitchen perimeter rather than through the work zone.
We suggest positioning your kitchen appliances to face the main living area, creating a natural focal point that draws people together. This arrangement transforms cooking from an isolated activity into a social experience.
Use Consistent Flooring Throughout
Consistent flooring materials help blend your kitchen with adjacent living areas by creating cohesive visual flow. We recommend extending the same flooring from your kitchen into connecting spaces to simplify the overall design and contribute to a more expansive feel.
This approach eliminates visual breaks that can make spaces feel compartmentalized and smaller. Hardwood, luxury vinyl, or large format tiles work exceptionally well for this purpose because they create uninterrupted sight lines.
We’ve found that consistent flooring also simplifies maintenance and creates a more sophisticated aesthetic. The continuous surface makes your entire open concept area feel like one unified space rather than separate rooms.
Create Visual Separation with Different Lighting
Different lighting styles can visually separate your kitchen from living areas without installing physical barriers. We recommend using pendant lights over kitchen islands paired with table lamps in living areas to create distinct zones while maintaining openness.
This layered lighting approach allows you to define functional areas through illumination rather than walls. Pendant lights provide task lighting for food preparation while softer ambient lighting in living spaces creates a relaxing atmosphere.
We suggest installing dimmer switches on all lighting circuits to adjust the mood throughout your open concept space. Track lighting can also highlight exact areas like artwork or architectural features, further defining separate zones within the unified space.
Strategic lighting placement helps maintain conversation flow while providing appropriate illumination for different activities happening simultaneously across your open floor plan.
Conclusion
We’ve covered a comprehensive range of kitchen layouts that can transform your cooking space into a functional and stylish hub. From narrow galley kitchens to spacious G-shaped designs each layout offers unique advantages for different homes and lifestyles.
The key to success lies in understanding your exact needs and working with your space rather than against it. Whether you’re dealing with a compact studio apartment or a large family home there’s a layout solution that’ll maximize your kitchen’s potential.
Remember that small changes can make a big impact. Strategic lighting improved storage answers and thoughtful appliance placement can dramatically enhance any kitchen’s functionality and appeal.
Start with one or two layout improvements that align with your budget and goals. Your kitchen is the heart of your home and with the right design approach it’ll serve you beautifully for years to come.
Frequently Asked Questions
What makes a good kitchen layout?
A good kitchen layout creates an efficient workflow between key areas (sink, stove, refrigerator), maximizes storage space, and suits your cooking habits. The best layouts consider the kitchen triangle principle, provide adequate counter space, and incorporate smart storage solutions like pull-out drawers and vertical cabinets to enhance functionality.
How can I make my galley kitchen feel bigger?
Use light colors for cabinets, backsplashes, and countertops to create a spacious feel. Install under-cabinet lighting to eliminate shadows, extend cabinets to the ceiling for vertical storage, and add floating shelves. Consider pull-out drawers and organizers to improve accessibility in narrow spaces.
What are the benefits of an L-shaped kitchen layout?
L-shaped kitchens maximize corner efficiency and create natural workflow zones, making them ideal for smaller spaces. They allow you to position the sink in awkward corners, maintain the kitchen triangle, and provide space for adding an island for extra storage and casual dining.
Why choose a U-shaped kitchen design?
U-shaped kitchens provide maximum storage with three walls of cabinetry and excellent workflow efficiency. They allow for distinct work zones, optimize the kitchen triangle, and offer ample counter space. Floor-to-ceiling cabinets maximize vertical storage while maintaining functionality.
Are kitchen islands worth the investment?
Yes, kitchen islands transform your kitchen into a social hub and provide additional counter space, storage, and seating. Multi-level islands create distinct zones for prep and dining, while built-in appliances like sinks streamline workflow and enhance the overall cooking experience.
What’s the advantage of a peninsula kitchen layout?
Peninsula kitchens excel in open floor plans by connecting spaces while maintaining functionality. They allow cooks to engage with family during meal prep, serve as room dividers without closing off areas, and can incorporate bar seating to create social hubs.
Can one-wall kitchens be functional?
Absolutely! One-wall kitchens are perfect for studio apartments and small spaces. Arrange appliances logically, use vertical storage solutions like floating shelves and pegboards, and consider fold-down tables for dining to maximize functionality while saving floor space.
What makes G-shaped kitchens ideal for large families?
G-shaped kitchens provide ample counter space, efficient storage, and separate prep areas. They accommodate multiple cooks with strategic appliance placement, allow for second sinks to reduce congestion, and can incorporate dedicated pantry wings for maximum storage capacity.
How do open concept kitchen layouts work?
Open concept kitchens seamlessly connect cooking spaces with living areas using consistent flooring and strategic lighting. L-shaped layouts work well in smaller open spaces, while layered lighting defines functional areas without physical barriers, maintaining conversation flow throughout.