Floor-length curtains absolutely transform your space by drawing the eye upward and creating an illusion of greater height. I’d measure from your curtain rod straight down to the floor, then subtract half an inch for that perfect “kiss” against the ground. Mount your rod 4–6 inches above the window frame and extend it 3–4 inches beyond each side for maximum impact. Avoid the rookie mistake of skipping floor clearance—dragging fabric wears out fast. The three styles—kiss, hover, and puddle—each demand different maintenance levels, so choose based on your lifestyle. There’s actually a lot more nuance to getting this right.
How Floor-Length Curtains Create Height and Visual Balance

Ever notice how a room suddenly feels taller when you hang curtains that actually touch the floor? It’s genuinely magical. When you measure from your rod to floor accurately, accounting for hardware thickness, those floor-length curtains draw your eye upward dramatically. Your ceiling seems higher. The whole space feels more balanced and intentional.
Here’s what I’ve discovered: this visual height trick works because curtains hang as vertical lines. Long lines make spaces feel taller—it’s basic design psychology. The key is precision in measurement. I measure rod to floor, subtract about half an inch for a kiss-length finish, then order accordingly.
You’ll notice immediately how your room transforms. That polished, tailored silhouette isn’t just pretty—it actually reshapes how you perceive your entire space. Trust me, you belong in rooms that feel this intentionally designed.
The Three Floor Lengths: Kiss, Hover, and Puddle

I’m genuinely thrilled to walk you through the three designer-approved lengths that’ll transform your space—Kiss, Hover, and Puddle—each offering its own vibe and practical benefits. You’ll discover how the Kiss style (curtains barely touching the floor) nails that polished, tailored look, while the Hover (floating about 1 centimeter up) brings modern cleanliness, and the Puddle (extending 1 to 6 inches onto the floor) delivers pure drama and luxury. Finding your perfect style means matching these lengths to your room’s mood and your lifestyle, because the right choice makes all the difference between curtains that look accidentally short and ones that look intentionally stunning.
Designer-Approved Length Styles
What’s the secret to curtains that look like they belong in a design magazine? I’ll tell you—it’s nailing your curtain measurement and curtain hanging guidelines. Three designer-approved lengths transform any room: Kiss length barely touches the floor for that tailored, high-end look. Hover length sits about one centimeter above, offering clean, modern vibes that work on uneven floors. Puddle length extends one to six inches onto the floor, adding drama and luxury perfect for formal spaces.
Each style requires different commitment levels:
- Kiss demands exact measuring and pre-washing for locked dimensions
- Hover tolerates imperfect floors while keeping edges crisp
- Puddle needs higher maintenance but delivers undeniable elegance
- Avoid High-Water lengths (two inches above floor)—designers reject them universally
- Match your lifestyle: pets and dust sensitivity favor Hover
Choosing Your Perfect Style
| Style | Best For | Vibe | Maintenance |
|---|---|---|---|
| Kiss curtains | Tailored elegance | High-end, precise | Exact measuring required |
| Hover length | Modern living | Clean, crisp | Low-maintenance favorite |
| Puddle curtains | Formal spaces | Dramatic luxury | Higher upkeep needed |
| High-Water (avoid) | Nowhere really | Unfinished, awkward | Undermines everything |
Your curtain rod placement and curtain length measurement work together—they’re not separate decisions. Kiss curtains demand pre-washed fabrics and exact measurements to lock dimensions. Hover length tolerates uneven floors beautifully, keeping edges crisp without fussing. Puddle curtains bring drama and luxury but need quality fabrics and regular dusting. Choose based on your lifestyle, not just aesthetics. Which reflects the home you’re creating?
How to Measure Your Window From Rod to Floor in 4 Steps

I’m thrilled to share the straightforward process that’ll make you feel like a pro at measuring your curtains! You’ll need just a few tools—a measuring tape, a notepad, and honestly, maybe a second person to hold the tape steady while you jot down those crucial numbers from your curtain rod to the floor. Once you’ve gathered everything and recorded your dimensions carefully, calculating your final curtain length becomes simple math that accounts for hardware like rings or grommets and that crucial half-inch floor clearance we talked about earlier.
Gathering Essential Measurement Tools
The magic of perfect curtains starts with one simple action: measuring from your rod straight down to the floor. I’ve learned that getting this curtain measurement right transforms everything about your window treatments.
Here’s what you’ll need for accurate rod-to-floor measurements:
- A steel measuring tape (at least 12 feet long)
- A level to ensure your rod hangs straight
- A notepad for recording measurements
- A step stool for safe, comfortable reaching
- A helper to hold the tape steady
The key is accounting for all hardware like rings or grommets that sit on your rod. When I measure, I start from the very bottom of whatever’s attached to that rod. This hardware accounting ensures your floor-length curtains hang perfectly. Taking time here prevents frustrating remeasures later.
Recording Accurate Window Dimensions
Now that you’ve got your tools gathered and your rod hanging perfectly level, it’s time to grab those measurements and write them down—this is where the real precision happens. Measure straight down from your rod height to the floor, and here’s the exciting part: this single measurement determines your entire curtain hang length. Write down your rod height, then subtract half an inch for perfect floor clearance. This guarantees your curtains won’t drag or bunch awkwardly. For your window dimensions, note the rod width too. If you’re going for that polished look where fabric just kisses the floor, precision matters. Jot everything down immediately—don’t rely on memory. These numbers become your blueprint for ordering the perfect curtain hang length that transforms your space.
Calculating Final Curtain Length
Ready to nail down those exact numbers that’ll make your curtains hang like a pro installed them?
Here’s your game plan for nailing the perfect curtain length:
- Measure from rod to floor using your tape measure, including any rings or grommets that’ll hold your fabric
- Subtract a half-inch clearance to prevent annoying dragging and friction on your floors
- Choose your vibe: one inch above floor for casual, or touch-the-floor for traditional elegance
- Account for puddling by adding 1–10 inches if you want that luxurious pooled look
- Double-check everything before ordering to avoid costly mistakes
This straightforward approach ensures your floor-length curtains look intentional and polished. The clearance difference seems tiny, but it’s genuinely transformative. You’re creating that designer-level detail that makes spaces feel intentionally styled. Your windows deserve precision!
Measuring Mistakes to Avoid

Why do so many curtain projects go sideways before the fabric even touches the rod? I’ve learned that measurement errors wreck even the best intentions. The biggest culprit? Forgetting floor clearance. You’ll measure from the rod to floor, then forget that half-inch gap that prevents dragging. Rod height mistakes also sabotage your vision—mount too low and your window framing shrinks visually.
| Common Mistake | What Happens |
|---|---|
| Skipping floor clearance | Curtains drag and wear unevenly |
| Measuring from wrong rod point | Length comes out wildly inaccurate |
| Ignoring rod height placement | Window appears smaller and cramped |
| Measuring only one spot | Uneven curtain length across width |
| Rushing measurements | Costly fabric waste and returns |
I avoid these traps by measuring twice, measuring from rings specifically, and always accounting for that crucial half-inch clearance.
Adjusting for Weight, Doors, and Ceilings

Once you’ve nailed down your basic measurements, the real magic happens when you account for what your curtains actually weigh and where they’re hanging—because fabric choice and room layout change everything.
Heavy blackout fabrics need sturdy support. I recommend pairing them with thicker poles and center brackets to keep your curtains hanging beautifully without sagging. For doors, extend your measuring rods 3–4 inches beyond the frame on each side, giving you full light access and preventing fabric snags when opening.
Heavy blackout fabrics demand thicker poles and center brackets to prevent sagging and ensure doors open smoothly without fabric snags.
Your ceiling height matters tremendously. Hanging rods just 4–6 inches from the ceiling creates taller-looking spaces, especially with floor-length drapes. After measuring from rod to floor, you’ll nail your curtains length perfectly.
- Heavy fabrics need wider mounting and center support
- Door clearance requires 3–4 inch rod extensions
- Low rod placement tricks eyes into seeing height
- Weight adjustment prevents that dreaded sagging look
- Measure rod-to-floor after determining ceiling placement
Rod Placement: Finding Your Correct Hanging Height

Where you hang your curtain rod is honestly the secret weapon for transforming how your whole room feels—and I love watching this moment click for people. Your rod placement creates what designers call the ceiling illusion. Mount it 4–6 inches above your window frame, and suddenly your ceilings appear taller and your space feels more expansive. Extend the rod 3–4 inches beyond each side for that professional look I’m totally obsessed with. When measuring for curtain length, start from the rod’s bottom to your floor, then subtract half an inch for breathing room. This hanging height adjustment changes everything about your window treatment measurements and overall room proportions. Trust me—getting this right makes you feel like an actual designer.
Rod Placement and Extension Math

How do you actually figure out where to mount that rod so your curtains look professionally styled?
I’m thrilled to break down curtain rod placement and extension beyond window for you—it’s genuinely the game-changer in window treatment width. Here’s what transforms your space:
- Mount your rod 4–6 inches above the window frame to visually elevate your room
- Extend the rod 3–4 inches beyond each side of the window for maximum light access
- Measure from rod to floor precisely, subtracting half-inch for floor-touching elegance
- Use fabric width at 1½ to 2 times your window frame width for fullness
- Employ high-and-wide installation techniques so windows appear dramatically larger
This measurement from rod to floor approach matters. When you nail these dimensions, your curtains hang like they belong in a designer’s portfolio. You’ve got this!
Modern vs. Classic: Floor Length Styles Explained

Your curtain’s relationship with the floor? It’s everything! I love how three distinct styles create completely different vibes. The modern hover style sits about 1 centimeter above the floor—clean, minimal, and forgiving of uneven surfaces. Then there’s kiss-length, which barely touches the floor with precision tailoring that demands exact measuring-hanging techniques. Finally, puddling extends 1–6 inches onto the floor, creating drama and opulence.
Here’s what I’ve discovered: hover lengths suit contemporary aesthetics and practical maintenance. Kiss-length requires pre-washing and drying to lock final dimensions for that high-end polish you’re after. But puddling? That demands quality fabrics and serious upkeep. Floor-length curtains in any style elevate room height and sophistication, transforming living rooms and bedrooms into genuinely polished spaces. Choose what matches your lifestyle and design dreams!
Hemming Curtains to Your Exact Floor Length

I’m thrilled to show you how to hem your curtains perfectly because getting that floor length just right transforms your entire room! You’ll need to measure from your rod down to the floor, subtract a half-inch for clearance, and then use basic hemming techniques—a simple hand stitch or sewing machine works beautifully—to adjust the fabric to your exact measurements. The magic happens when you account for those tricky details like uneven floors and high-traffic areas, which means you might hover your curtains about 1 centimeter above the ground for that polished, designer-approved look.
Measuring Your Exact Length
Getting the length just right—that’s where curtains transform from so-so to stunning. I measure from the rod down to the floor, including rings and grommets, then subtract a half-inch for floor clearance. This prevents that awkward bunching at the bottom.
Here’s what I focus on:
- Measure from the bottom of the rod or rings to your floor
- Subtract half an inch to ensure a precise kiss with the floor
- Account for fabric shrinkage after washing to maintain exact floor length
- Plan consistent hem allowance across both panels for balanced curtain length
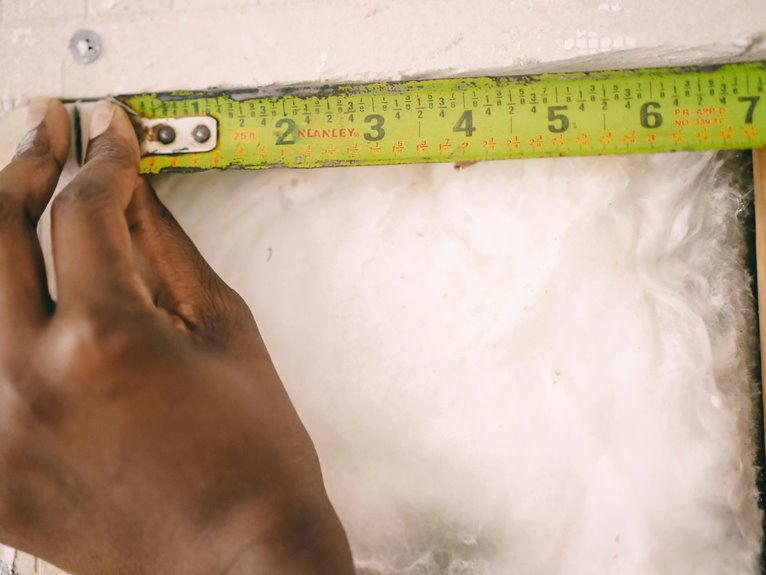
- Use a measurement tool to visualize the final drop before cutting
Getting your measurement spot-on means your curtains’ll look intentional and polished, not haphazard.
Hemming Techniques And Tools
Perfect hemming—that’s the magic that separates custom-looking curtains from store-bought mediocrity. I’ve learned that the right tools make all the difference. You’ll need a measuring tape for precision, tailor chalk to mark your cutting line, an iron to press creases sharp, pins to hold fabric steady, and a sewing machine for reliable stitching.
I typically use a double hem, folding the fabric twice before sewing—it looks polished and prevents fraying. If you’re after a sleeker finish, try a blind hem, which hides stitches completely inside the fold. Both techniques require patience, but they’re absolutely worth it.
Start by measuring from rod to floor, subtract that half-inch for clearance, then mark with tailor chalk. Press, pin, sew carefully, and you’ve got curtains that feel genuinely yours.
Adjusting For Floor Clearance
Now that you’ve mastered the hemming techniques, it’s time to nail down the exact measurement—and that half-inch clearance is your secret weapon.
I’m telling you, this tiny gap transforms your whole look. Measure from your rod height straight down to the floor, then subtract that essential half-inch. This measurement method prevents fabric from dragging and collecting dust. Your curtain length depends on the style you’re chasing—sleek and modern, or casual and relaxed.
Here’s what makes the difference:
- Measure after installation when hardware’s fully mounted
- Account for rod drop and decorative projections affecting final height
- Check length after initial hemming and any fabric shrinkage
- Use pre-washed fabric to prevent surprise length changes
- Recheck measurements before final hemming
That floor clearance becomes your signature detail, honestly. You’ll notice immediately how professional it looks.
Test and Install: Confirming Perfect Fit

Before you commit to hanging your curtains permanently, have you considered doing a test run? I’d drape mine temporarily using painter’s tape to verify my curtain length and rod placement before making permanent holes. Measure from rod to floor, subtract that half-inch floor clearance, then hang a sample panel. Does it have proper fullness across your window width? Does the fabric drape beautifully without bunching? Adjust your rod placement if needed—remember, positioning it 4–6 inches above the window frame makes a real difference. Once everything looks perfect, you’ll feel confident installing permanently. This test phase saves frustration and ensures your curtains frame your space exactly as you’ve envisioned. Trust me, this small step makes all the difference in achieving that polished, intentional look you’re after.