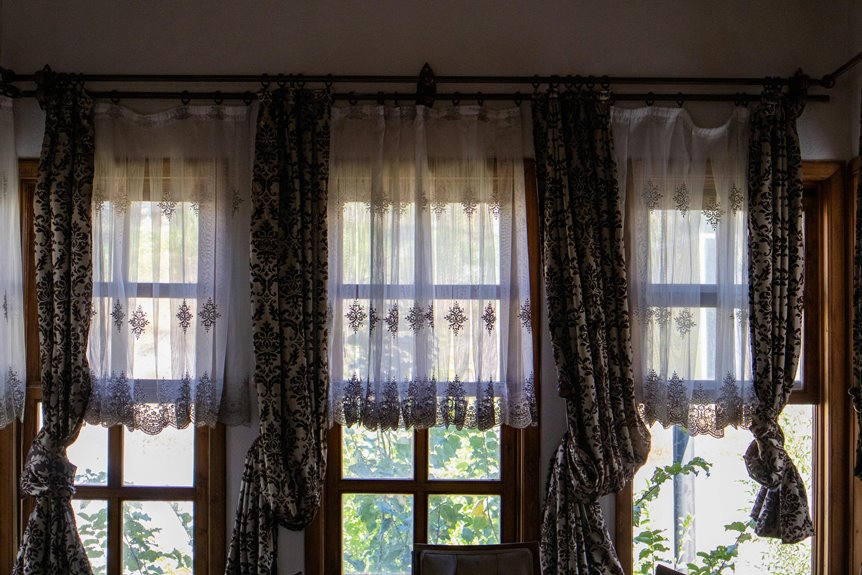
I’ll share where I place holdbacks to get those stunning, symmetrical drapes. First, measure your curtain length and mark the bottom edge on both sides. Find the one-third point up from there—that’s your sweet spot for holdback height. Mark both sides identically using a level. Position holdbacks 1–2 inches from the window casing, locate wall studs with a stud finder, drill pilot holes, and secure firmly. Test the fabric pull for even gathering, then tweak slightly until everything looks balanced and gorgeous. Stick around for the detailed breakdown that’ll make you a holdback pro.
Measure Your Curtain Length and Mark the Bottom Edge

How do you know where to actually place those holdbacks? I’ll walk you through it—it’s easier than you’d think! First, I measure my curtain length from the top of the rod straight down to the bottom edge. This gives me the total measurement I need to work with.
Next, I mark where that bottom edge sits. This is crucial because your holdbacks placement depends on it. I use a pencil to lightly mark both sides of my curtains at the same height—that’s symmetrical marking, which keeps everything balanced and professional-looking.
Here’s my tip: take your total curtain length and mentally divide it into thirds. This measurement becomes your reference point. Once I’ve marked both panels identically, I’m ready to position those holdbacks perfectly!
Find the One-Third Mark on Your Curtain

Now I’ll show you how to find that magic one-third mark—it’s easier than you’d think! Take your curtain’s total length and divide it by three, then measure up from the bottom edge to mark that exact spot on both panels. Getting this measurement right is the foundation for those gorgeous, balanced folds that’ll make your windows look professionally styled.
Measuring Your Curtain Length
Why’s the one-third mark so important? It’s your secret to perfectly balanced curtain holdbacks! Finding this measurement ensures your curtains drape beautifully and frame your windows just right.
Here’s what I measure for standard curtain lengths:
- 84-inch panels: mark at 28 inches from the bottom
- 95-inch panels: mark at 31.7 inches from the bottom
- 108-inch panels: mark at 36 inches from the bottom
- 120-inch panels: mark at 40 inches from the bottom
For cafe curtains, I measure one-third of their actual length, not from the rod. Then I mark both sides evenly—this is essential! Using a level alignment across both marks guarantees symmetrical holdbacks placement. This measurement becomes your foundation for everything else, so getting it right makes the entire installation process smoother and more rewarding.
Marking The Exact Position
Once you’ve got your measurements written down, it’s time to actually mark where those holdbacks belong on your curtains. I find the one-third mark by measuring up from the bottom of the panel—this sweet spot creates that gorgeous, natural drape we’re after. Here’s the essential part: grab your level and mark both sides at exactly the same height for symmetrical installation. This guarantees your curtains won’t look lopsided, which honestly makes all the difference in a room.
For floor-length drapes, I adjust the marking position slightly higher to accommodate those elegant folds when pulled open. Shorter curtains might need the mark moved down a touch for cleaner proportions. Once both sides align perfectly with level marking, you’re ready for installation. This careful attention to detail transforms your entire space.
Mark the Holdback Height on Both Sides of the Window

How do you know exactly where to hook those holdbacks so your curtains look professionally styled? I’ll share the technique that’s transformed my own windows!
Start by marking your holdback height at about one-third up from the bottom of your curtain panel. This creates that balanced, polished look we’re all after. Here’s what I do:
- Use a pencil to mark both sides of the window
- Place marks slightly higher for floor-length or puddled drapes
- Grab your level—it’s your best friend for symmetrical installation
- Keep marks at least 1 inch away from the window edge
For dramatic swags or heavier fabrics, I mark a touch higher to accommodate all that gorgeous drape. Those perfectly even marks? That’s when you know you’re ready for installation. Trust me, this step makes all the difference!
Decide How Far From the Window You Want the Holdback

Now that you’ve marked those perfect height lines on both sides of your window, it’s time to figure out how far from the window casing—that’s the trim around your window frame—you actually want to place those holdbacks.
Start with 1 to 2 inches from the casing, then move outward based on your curtain fullness and room width. I love watching how this adjustment transforms everything! Moving your holdbacks outward creates fuller, more dramatic drapes that stack neatly without pulling tight.
Think about your symmetry placement too. Both sides need matching distances for that balanced, polished look. Experiment by holding your holdbacks at different spots along the marked heights until the fabric falls exactly how you want it. This hands-on approach ensures your mounting height and holdbacks placement work perfectly together.
Position Holdbacks 1–2 Inches From the Window Casing

Why does that magic 1–2 inch distance matter so much? It’s the difference between curtains that glide effortlessly and ones that fight your window casing every time you draw them closed.
That magic 1–2 inch distance transforms curtains from fighting your casing to gliding effortlessly every single time.
When I position curtain holdbacks at this sweet spot from the window casing, I’m solving multiple problems at once:
- Prevents fabric from snagging on trim and frame edges
- Keeps drapes hanging symmetrically on both sides
- Reduces stress on drapery hardware from heavier fabrics
- Ensures smooth operation every single time you use them
This installation distance protects your investment while creating that polished, intentional look we’re all after. For tracks extending beyond your window, I adjust slightly outward to avoid bunching. That 1–2 inch offset isn’t arbitrary—it’s professional spacing that transforms your entire window treatment into something you’ll genuinely enjoy using daily.
Level Your Holdbacks for Even Alignment

Getting your holdbacks perfectly level is where the magic really happens—this is the step that transforms your whole window treatment from “nice try” to “wow, that looks professionally done.” Before you tighten anything down permanently, grab a level (that trusty tool that shows you whether something’s perfectly straight or slightly off), and place it horizontally across both holdbacks on the same side of your window. You want both at exactly the same height. If one sits higher than the other, your entire even drape collapses. Adjust whichever holdback needs moving until that bubble centers perfectly between the lines. Then repeat on the opposite side. This symmetrical placement creates that cohesive, intentional look you’re after. Once everything’s aligned, you’ve nailed the holdbacks height game—and your curtains will thank you with gorgeous, balanced folds.
Locate Wall Studs or Choose Appropriate Anchors

Since your holdbacks are now perfectly leveled, it’s time to make sure they’ll actually stay put—and that’s where finding the right anchor method comes in. I always grab my stud finder first because studs provide the ultimate stability, especially with heavier fabrics that’ll pull constantly.
When studs aren’t cooperating with your mounting height, quality wall anchors save the day. Here’s what I consider:
- Heavy-duty toggle bolts for drywall installations
- Molly bolts rated for your hardware’s weight
- Sleeve anchors for concrete or plaster walls
- Zinc-plated anchors for longevity and symmetry
I mark both sides at identical heights before drilling anything. This ensures perfect symmetry and that level you worked hard to achieve. Your holdbacks deserve anchoring that’ll keep them secure for years.
Drill Pilot Holes and Secure the Holdbacks Firmly

Now that you’ve got your anchor strategy locked in, it’s time to actually drill—and this is where precision really pays off. I drill pilot holes slightly smaller than my screw diameter to prevent wood splitting and guarantee exact placement. This matters because uneven holes lead to crooked curtain holdbacks that’ll drive you crazy every time you look at them.
When I’m working with studs, I’m confident my mounting hardware will hold beautifully. For wall anchors, I follow the manufacturer’s weight rating carefully—no shortcuts here. I level both sides before final tightening, which prevents that annoying sag that happens when one side sits higher than the other.
Two-point mounting through the bracket and decorative post distributes weight evenly across your curtain holdbacks, creating that polished, professional look you’re after.
Test for Smooth Pull and Even Fabric Gathering

How’s your fabric draping right now? I’m excited to share this crucial step that transforms your whole project. Now comes the satisfying part: testing your holdback placement to ensure everything looks gorgeous.
Here’s what I do to nail the test pull:
- Pull the curtain behind each holdback and check for smooth, even gathers
- Adjust positions if fabric bunches unevenly or pulls too tight
- Ensure symmetric placement on both sides for perfect visual balance
- Step back and admire how the fabric cascades naturally
I gently tug the fabric to see how it responds. The material should glide effortlessly without resistance. If you’re getting tight spots or lopsided folds, shift those holdbacks slightly—even 1 to 2 inches makes a real difference. This test pull reveals whether your holdback placement truly creates those elegant drapes you’re envisioning.
Tweak the Position Until the Drape Looks Right

Now I’ll gently pull the fabric to one side and observe how it naturally falls—this is where the magic happens! I’m looking for smooth, even gathers that create those gorgeous swoops and curves, so I’ll shift the holdback slightly inward or outward until the drape feels balanced and looks intentional rather than bunched. Once I’ve got that perfect visual rhythm where both panels mirror each other, I’ll know I’ve nailed the placement.
Test The Fabric Drape
Once you’ve mounted your holdbacks, the real magic happens—pull that curtain to the side and actually see how the fabric behaves! This testing phase reveals everything about your positioning and installation height choices.
I always check these key elements when testing fabric drape:
- How the fabric naturally folds behind the hardware
- Whether gentle curves form or bunching occurs
- If the symmetry matches on both sides
- The overall visual balance from across the room
Pull gently and adjust your holdbacks higher or lower until you find that sweet spot. Aim for a soft curve roughly one-third up from the bottom—this creates that designer look we’re all after. Move the hardware outward slightly for fuller, more dramatic folds, or keep it closer for cleaner lines. Use your level to ensure both sides align perfectly, creating that polished, intentional appearance that makes your space feel professionally finished.
Adjust For Visual Balance
Why does your curtain drape look slightly off even though you’ve installed the holdbacks?
The magic happens when you fine-tune your mounting height. I’ve learned that achieving perfect visual balance requires tweaking. If your drape feels droopy or pulls uncomfortably at the fabric, adjust your holdback height slightly higher or lower. This small shift transforms everything.
Symmetry matters tremendously for that polished look you’re after. Mark both sides at identical mounting heights before securing anything permanently. This ensures even curtain fullness across your window. Once mounted, step back and observe how the fabric flows.
Does it create that elegant curve you envisioned? Does the overall visual balance feel right? Trust your instincts here. Sometimes moving holdbacks just an inch changes the entire aesthetic. Keep adjusting until you’re genuinely proud of those graceful folds.